How to Build a Targeted Lead List Using LinkedIn Sales Navigator
In today’s fast-paced sales world, success is not just about working harder, it’s about working smarter. If you're not leveraging LinkedIn Sales Navigator to refine your lead generation strategy, you're missing out on a game-changing tool. This guide will walk you through a step-by-step process to build a high-converting, targeted lead list using Sales Navigator effectively.
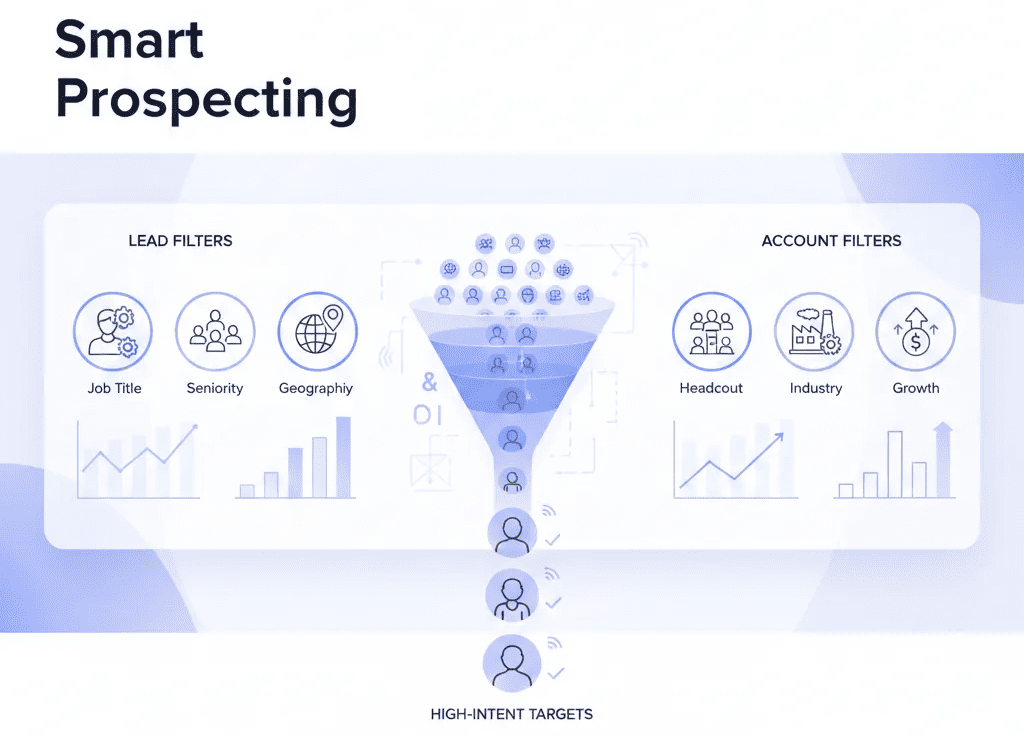
Step 1: Define Your Ideal Customer Profile (ICP)
Before diving into the search, take the time to define exactly who your ideal customers are. Identifying the right prospects ensures that your outreach efforts yield maximum impact. Consider these factors:
- Industry: Are you targeting tech companies, finance firms, or manufacturing businesses?
- Company Size: Are your ideal clients startups, mid-size firms, or large enterprises?
- Job Title and Seniority Level: Are you reaching out to decision-makers, influencers, or both?
- Location: Are your prospects concentrated in a specific region, or are you expanding globally?
- Pain Points and Challenges: What are their key business challenges, and how does your product or service address them?
A well-defined ICP ensures that your lead list is focused and relevant, increasing the likelihood of meaningful connections and successful conversions.
Step 2: Use Advanced Search Filters to Narrow Your Focus
LinkedIn Sales Navigator offers a range of advanced filters to help you pinpoint high-quality leads. To refine your search, use:
- Company Filters: Filter by industry, company size, revenue, and growth trends.
- Role-Based Filters: Narrow down by job title, seniority level, function, and years of experience.
- Geographical Filters: Target leads based on country, region, or city.
- Keyword Search: Use relevant keywords to fine-tune results and ensure a high level of relevance.
Experiment with different combinations to get the most precise results and identify prospects who align with your business goals.
Step 3: Master Boolean Search for Maximum Precision
Take your search a step further by using Boolean operators to refine your results with pinpoint accuracy.
- AND: Include multiple criteria (e.g., 'Sales Manager' AND 'B2B SaaS').
- OR: Include alternative job titles (e.g., 'VP Sales' OR 'Head of Business Development').
- NOT: Exclude specific terms (e.g., 'Marketing Manager' NOT 'Intern').
- Quotes (''): Search for exact phrases (e.g., 'Chief Revenue Officer').
- Parentheses (): Combine multiple criteria for more precise targeting (e.g., ('Sales Director' OR 'Head of Sales') AND 'Software').
By refining your search with Boolean logic, you can significantly improve the quality and relevance of your leads.
Step 4: Organize Leads into Lists
Once you have identified promising leads, use Sales Navigator’s list feature to keep them organized. Categorizing leads ensures a more structured approach to prospecting. Common list categories include:
- High-Priority Leads: Top prospects who require immediate attention
- Industry-Specific Leads: Grouped based on sectors for industry-focused outreach.
- Account-Based Leads: Contacts within specific target accounts.
By systematically categorizing leads, you streamline your workflow and make your outreach efforts more strategic and efficient.
Step 5: Set Up Alerts to Stay Ahead
Sales Navigator provides real-time alerts that keep you informed about important developments in your prospects' careers. Use alerts to track:
- Job Changes: When a key contact moves to a new company, it may create an opportunity for engagement.
- Company Updates: Funding rounds, acquisitions, and other news can serve as excellent conversation starters.
- Content Engagement: If a prospect interacts with industry-relevant content, engaging with them at the right time can enhance rapport and increase response rates.
By staying updated, you can reach out to prospects when they are most likely to be receptive.
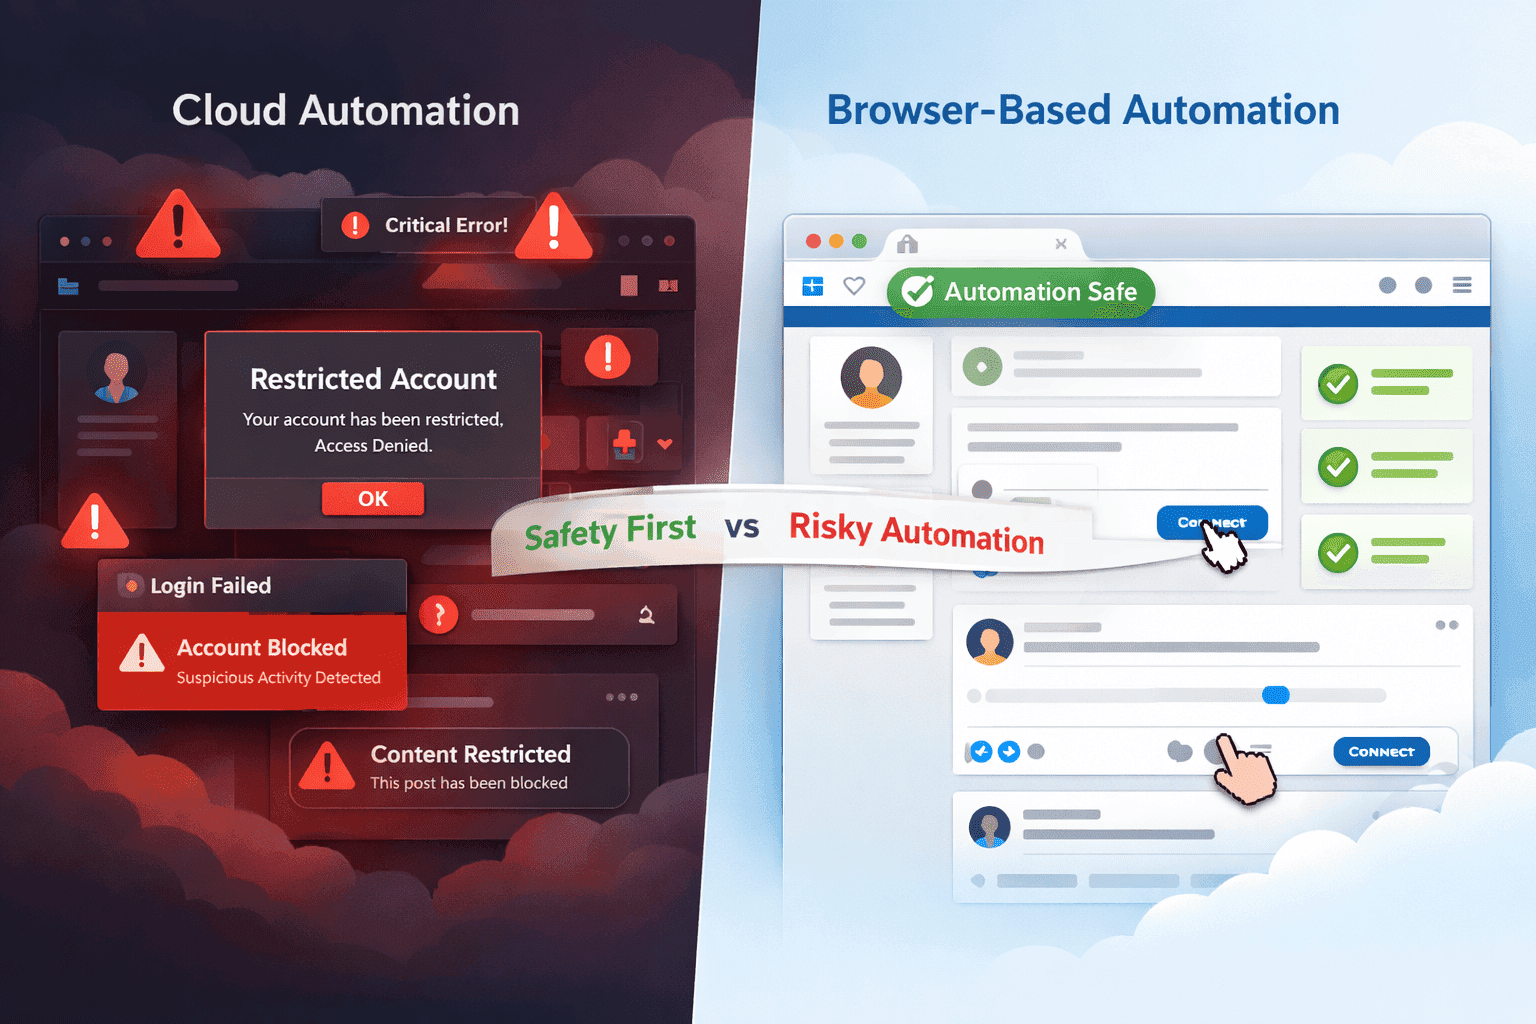
Step 6: Export Leads for Scalable Outreach
Once you’ve built a strong lead list, scaling your outreach efforts is the next step. Tools like OutX enable you to extract LinkedIn Sales Navigator search results efficiently, allowing you to:
- Organize contact data for structured outreach.
- Automate messaging sequences while maintaining a personalized touch.
- Streamline prospecting without sacrificing engagement quality.
With the right automation tools, you can scale your lead generation process without losing precision.
See the complete [Sales Navigator Export documentation](https://www.outx.ai/docs/documentation/data-export/linkedin-sales-navigator) for detailed instructions.
Step 7: Personalize Your Outreach for Higher Conversions
Even the best lead list won’t drive results if your outreach lacks personalization. To maximize engagement, tailor your approach to each prospect:
- Reference Common Ground: Mention shared connections, groups, or interests to establish rapport.
- Acknowledge Recent Activities: Congratulate prospects on promotions or engage with their posts before reaching out.
- Keep Messages Concise and Action-Oriented: Avoid lengthy messages. Be clear about why you're reaching out and what action you want them to take.
- Follow Up Strategically: If a lead doesn’t respond, don’t assume disinterest. A well-timed follow-up can often turn a cold lead into a warm prospect.
Personalized, well-structured messages dramatically increase the chances of meaningful engagement and lead conversions.
Conclusion: Turn LinkedIn Sales Navigator into a Lead Generation Machine
LinkedIn Sales Navigator isn’t just a tool, it’s a competitive advantage. When used correctly, it transforms prospecting from a time-consuming guessing game into a data-driven, highly strategic process.
By mastering advanced search filters, Boolean search, lead organization, and personalized outreach, you can create a seamless pipeline that drives consistent results. Pairing this with automation tools like OutX allows you to scale your efforts without compromising quality.
Start optimizing your lead generation strategy today and turn LinkedIn into your most powerful sales engine.
Looking to automate and enhance your LinkedIn outreach? Try OutX today.