- Where to engage (keywords, people, or companies)
- What to do (like, comment, or both)
- How often to engage
Why Use Auto Engagement?
Consistency and timing are critical on LinkedIn. Auto Engagement helps you:- Show up early on relevant posts
- Stay visible without daily effort
- Build relationships at scale
- Grow your personal brand naturally
How Auto Engagement Works
Auto Engagement always runs on a watchlist.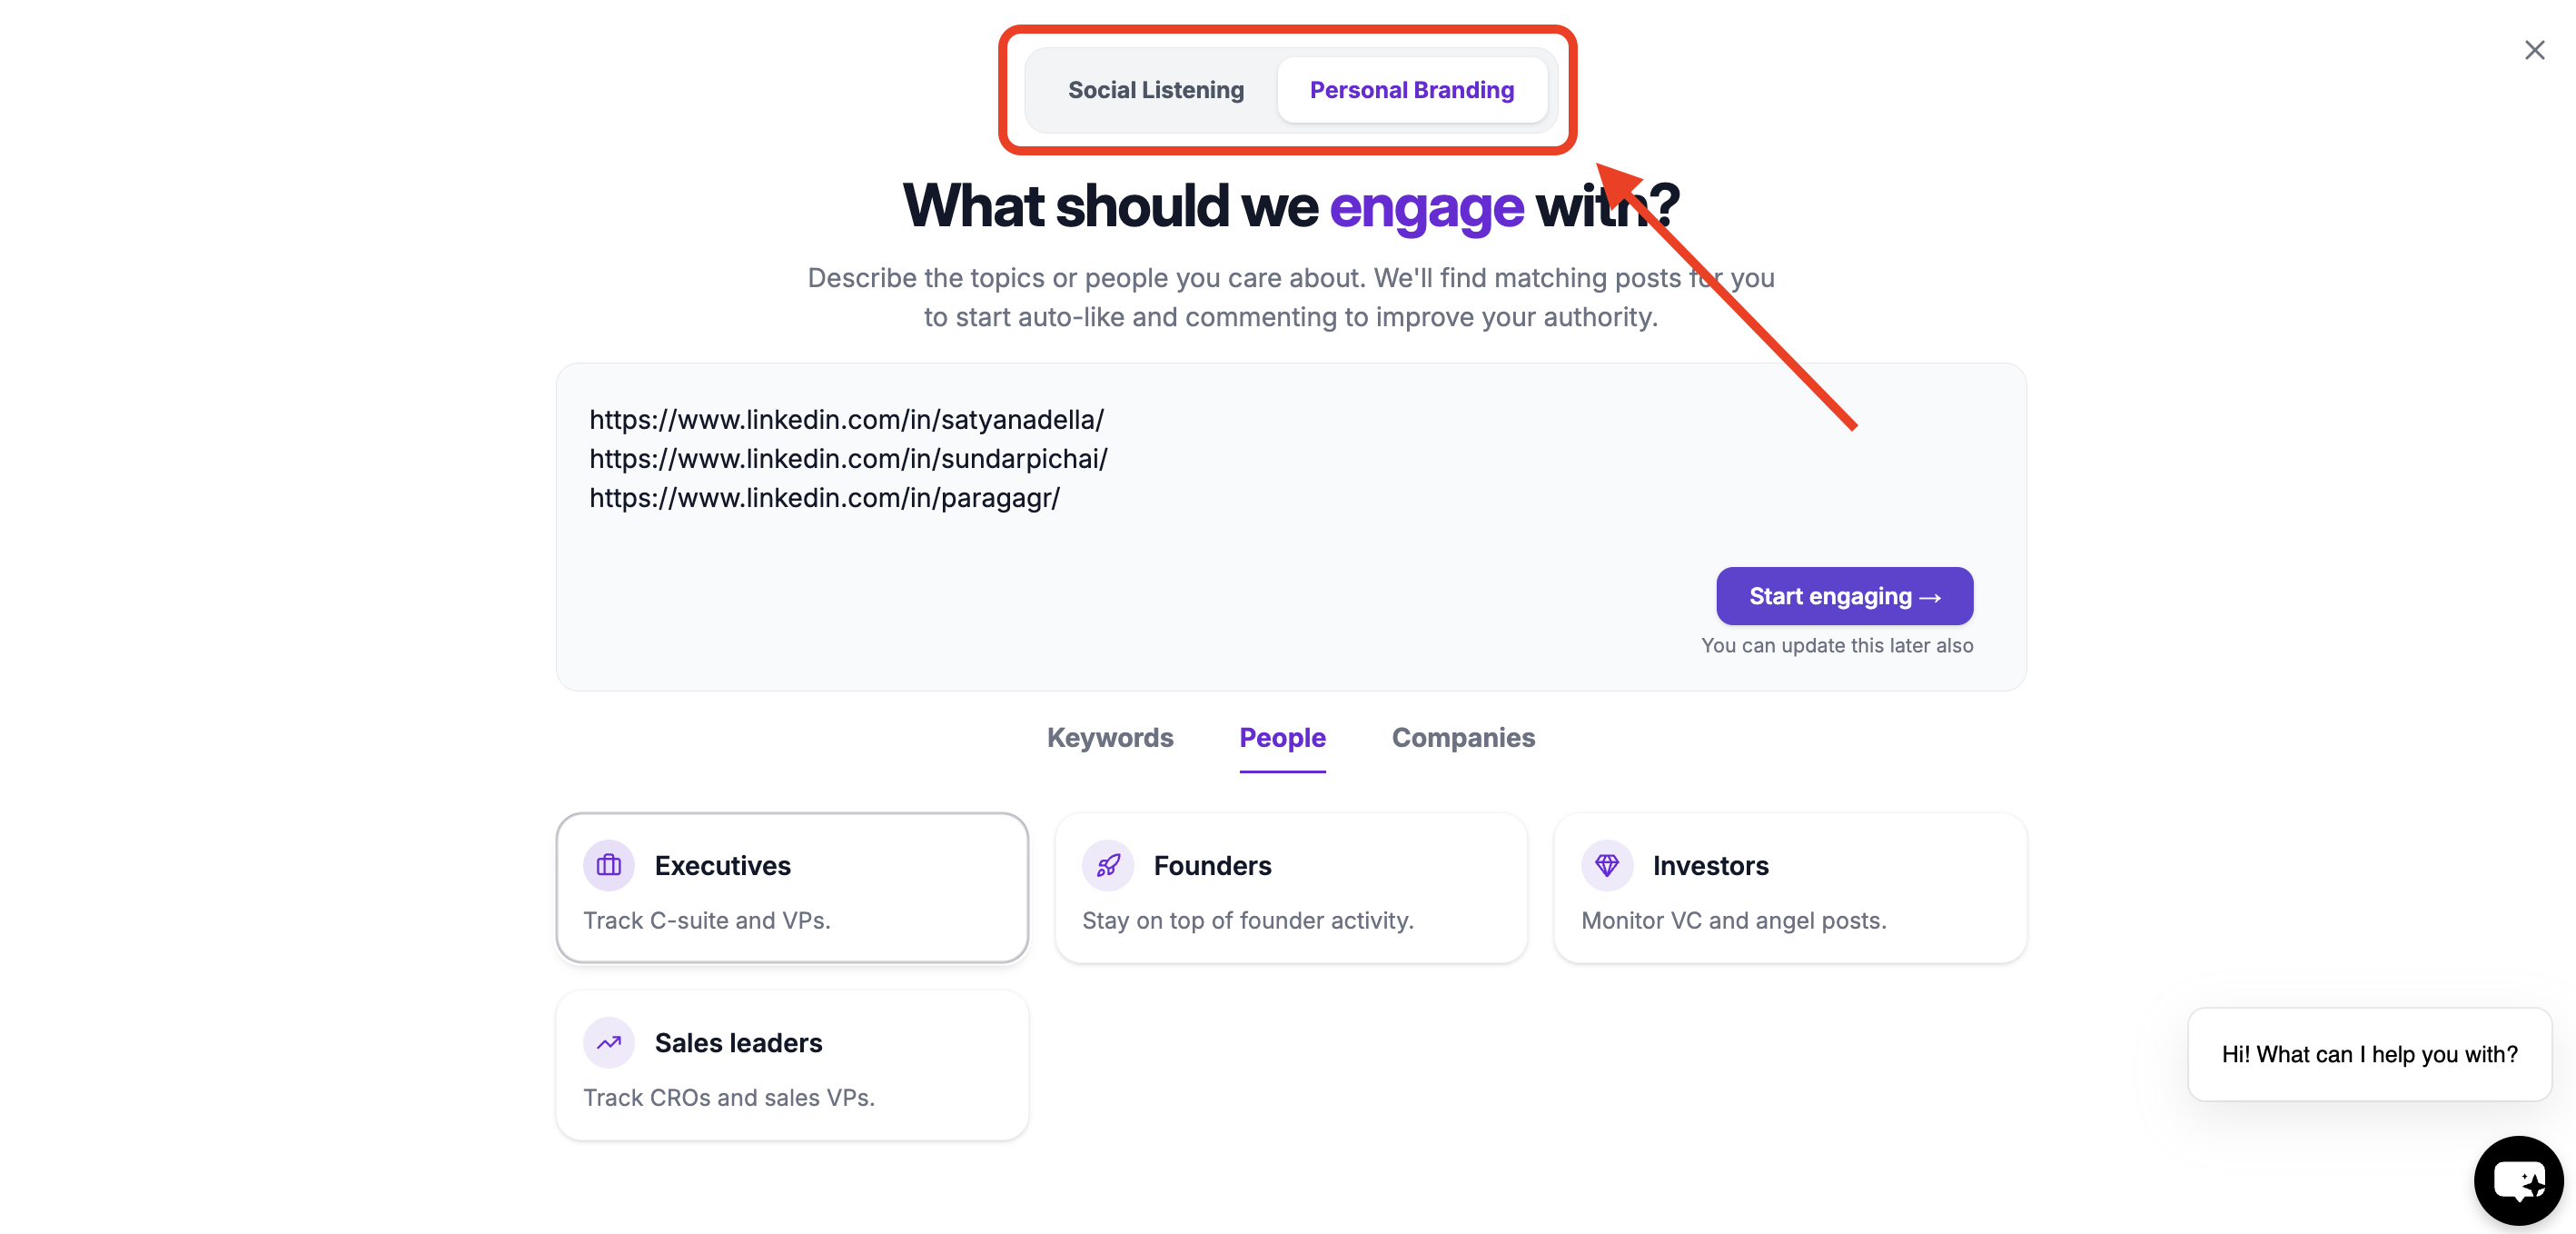
- Select Personal Branding
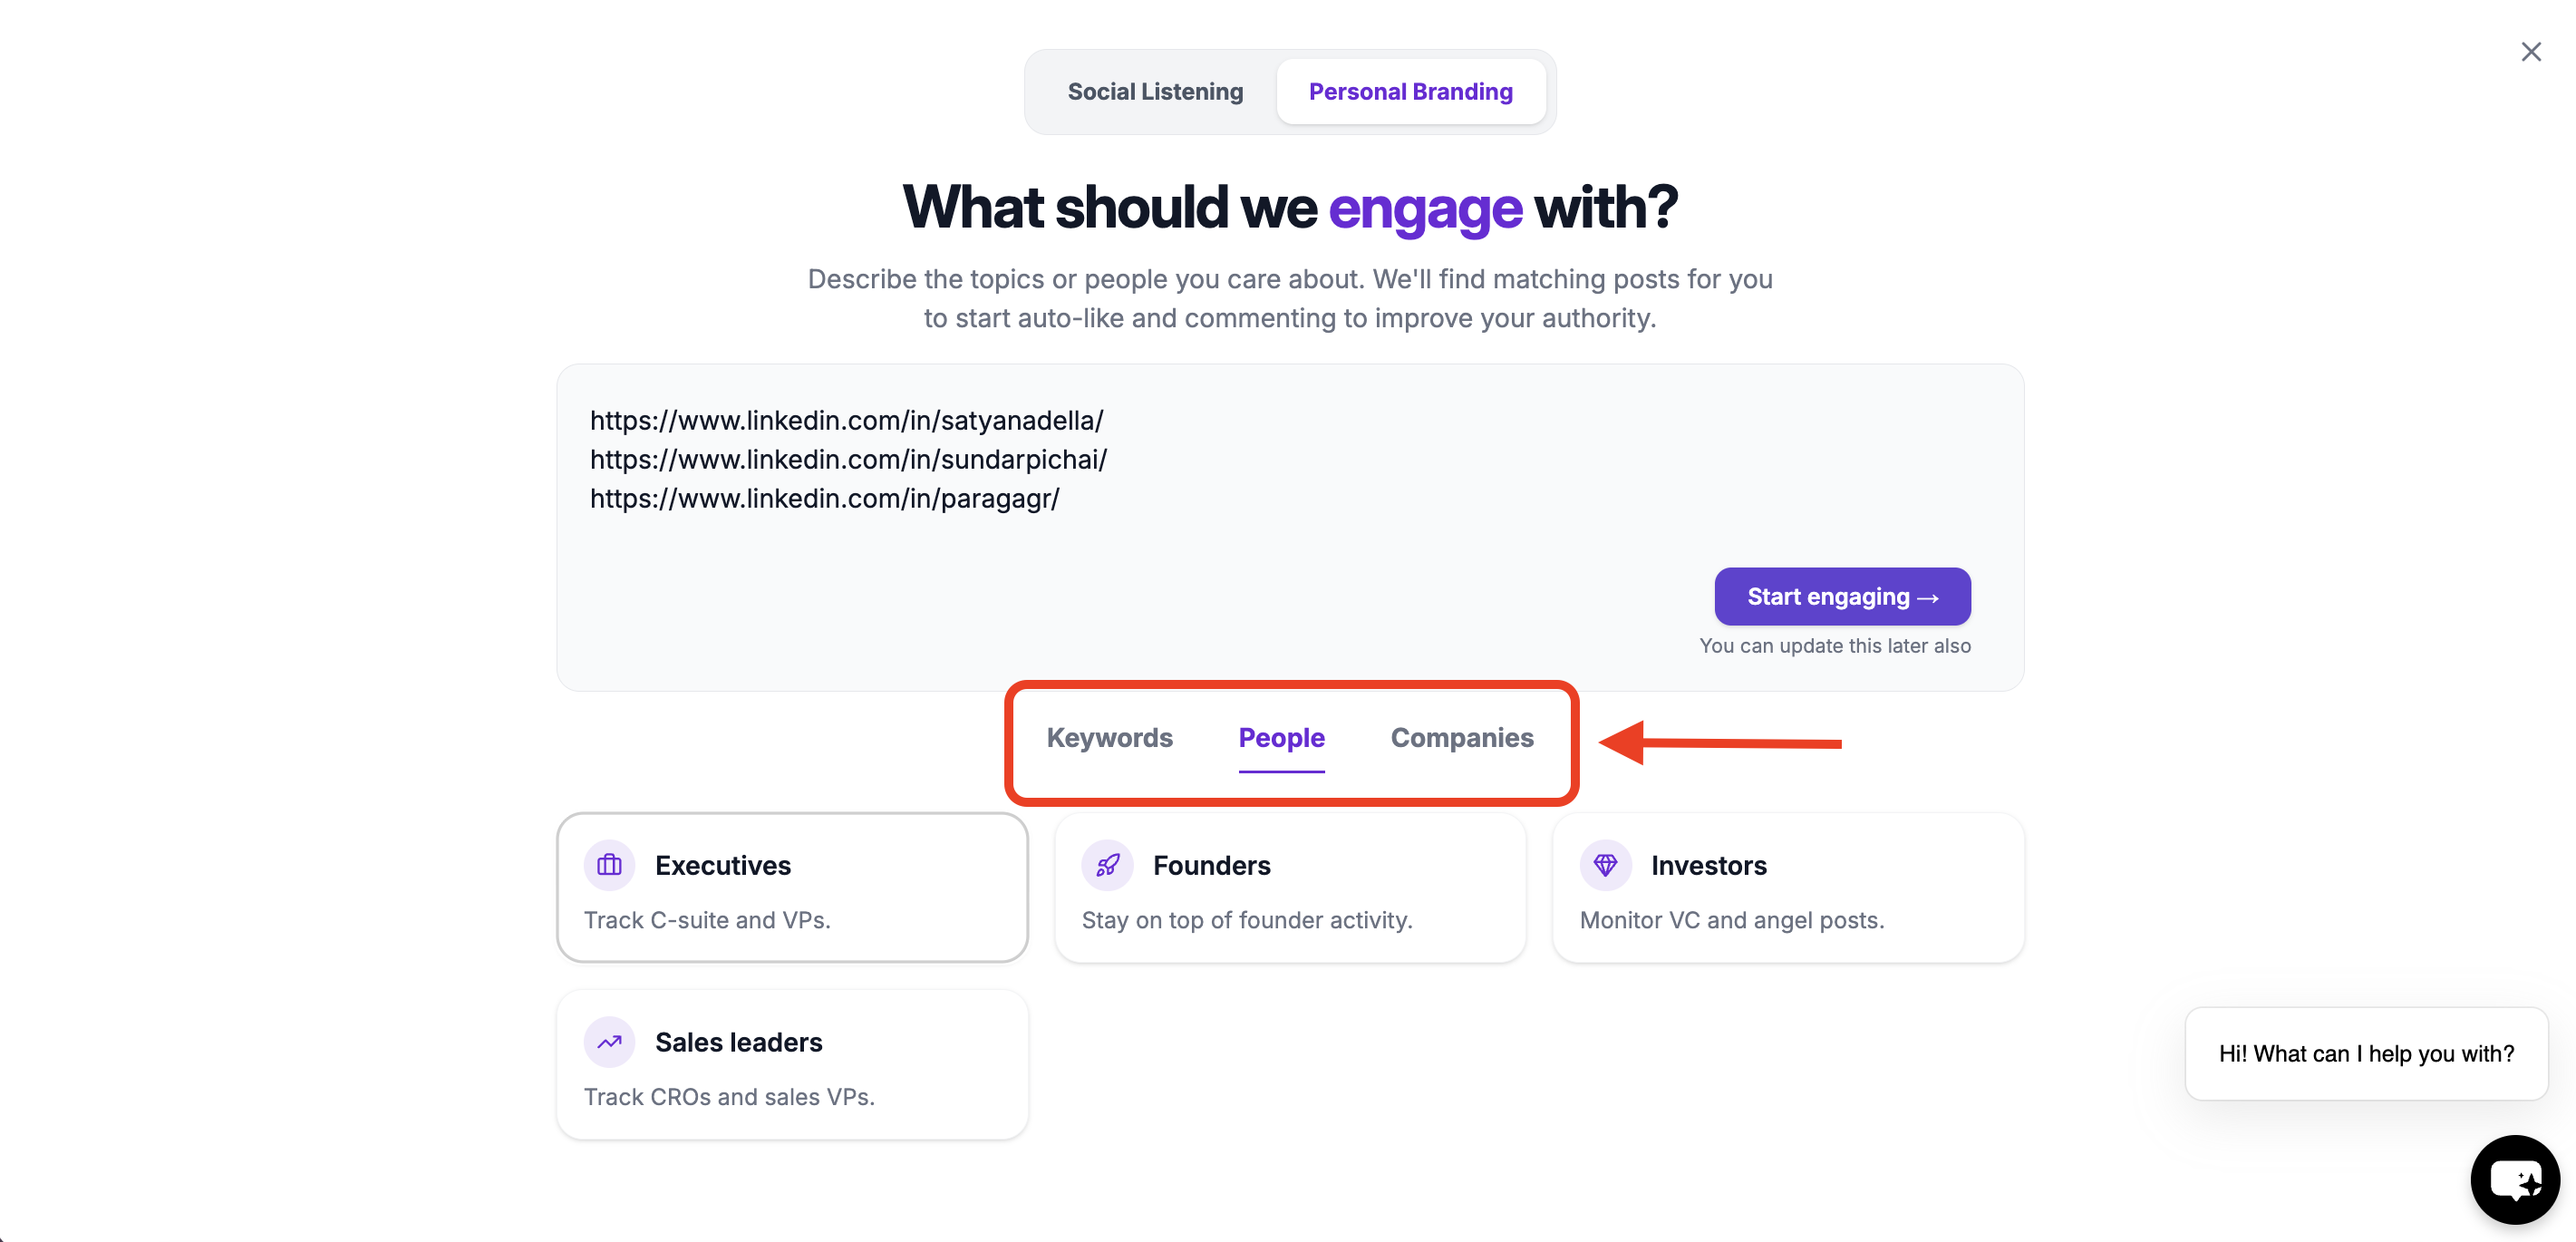
- Choose where you want to auto-engage:
- Keyword watchlists
- People watchlists
- Company watchlists
- Create engagement rules
Choose Where You Want to Auto-Engage
You can enable Auto Engagement on one or more of the following:Keyword Watchlists
Engage with posts related to specific topics or conversations. Best for:- Personal branding
- Thought leadership
- Industry conversations
People Watchlists
Engage as soon as specific people post. Best for:- Sales & outbound
- Relationship building
- Staying top-of-mind
Company Watchlists
Engage with posts from specific companies. Best for:- Target accounts
- Competitor pages
- Partner companies
Create Your Engagement Rule
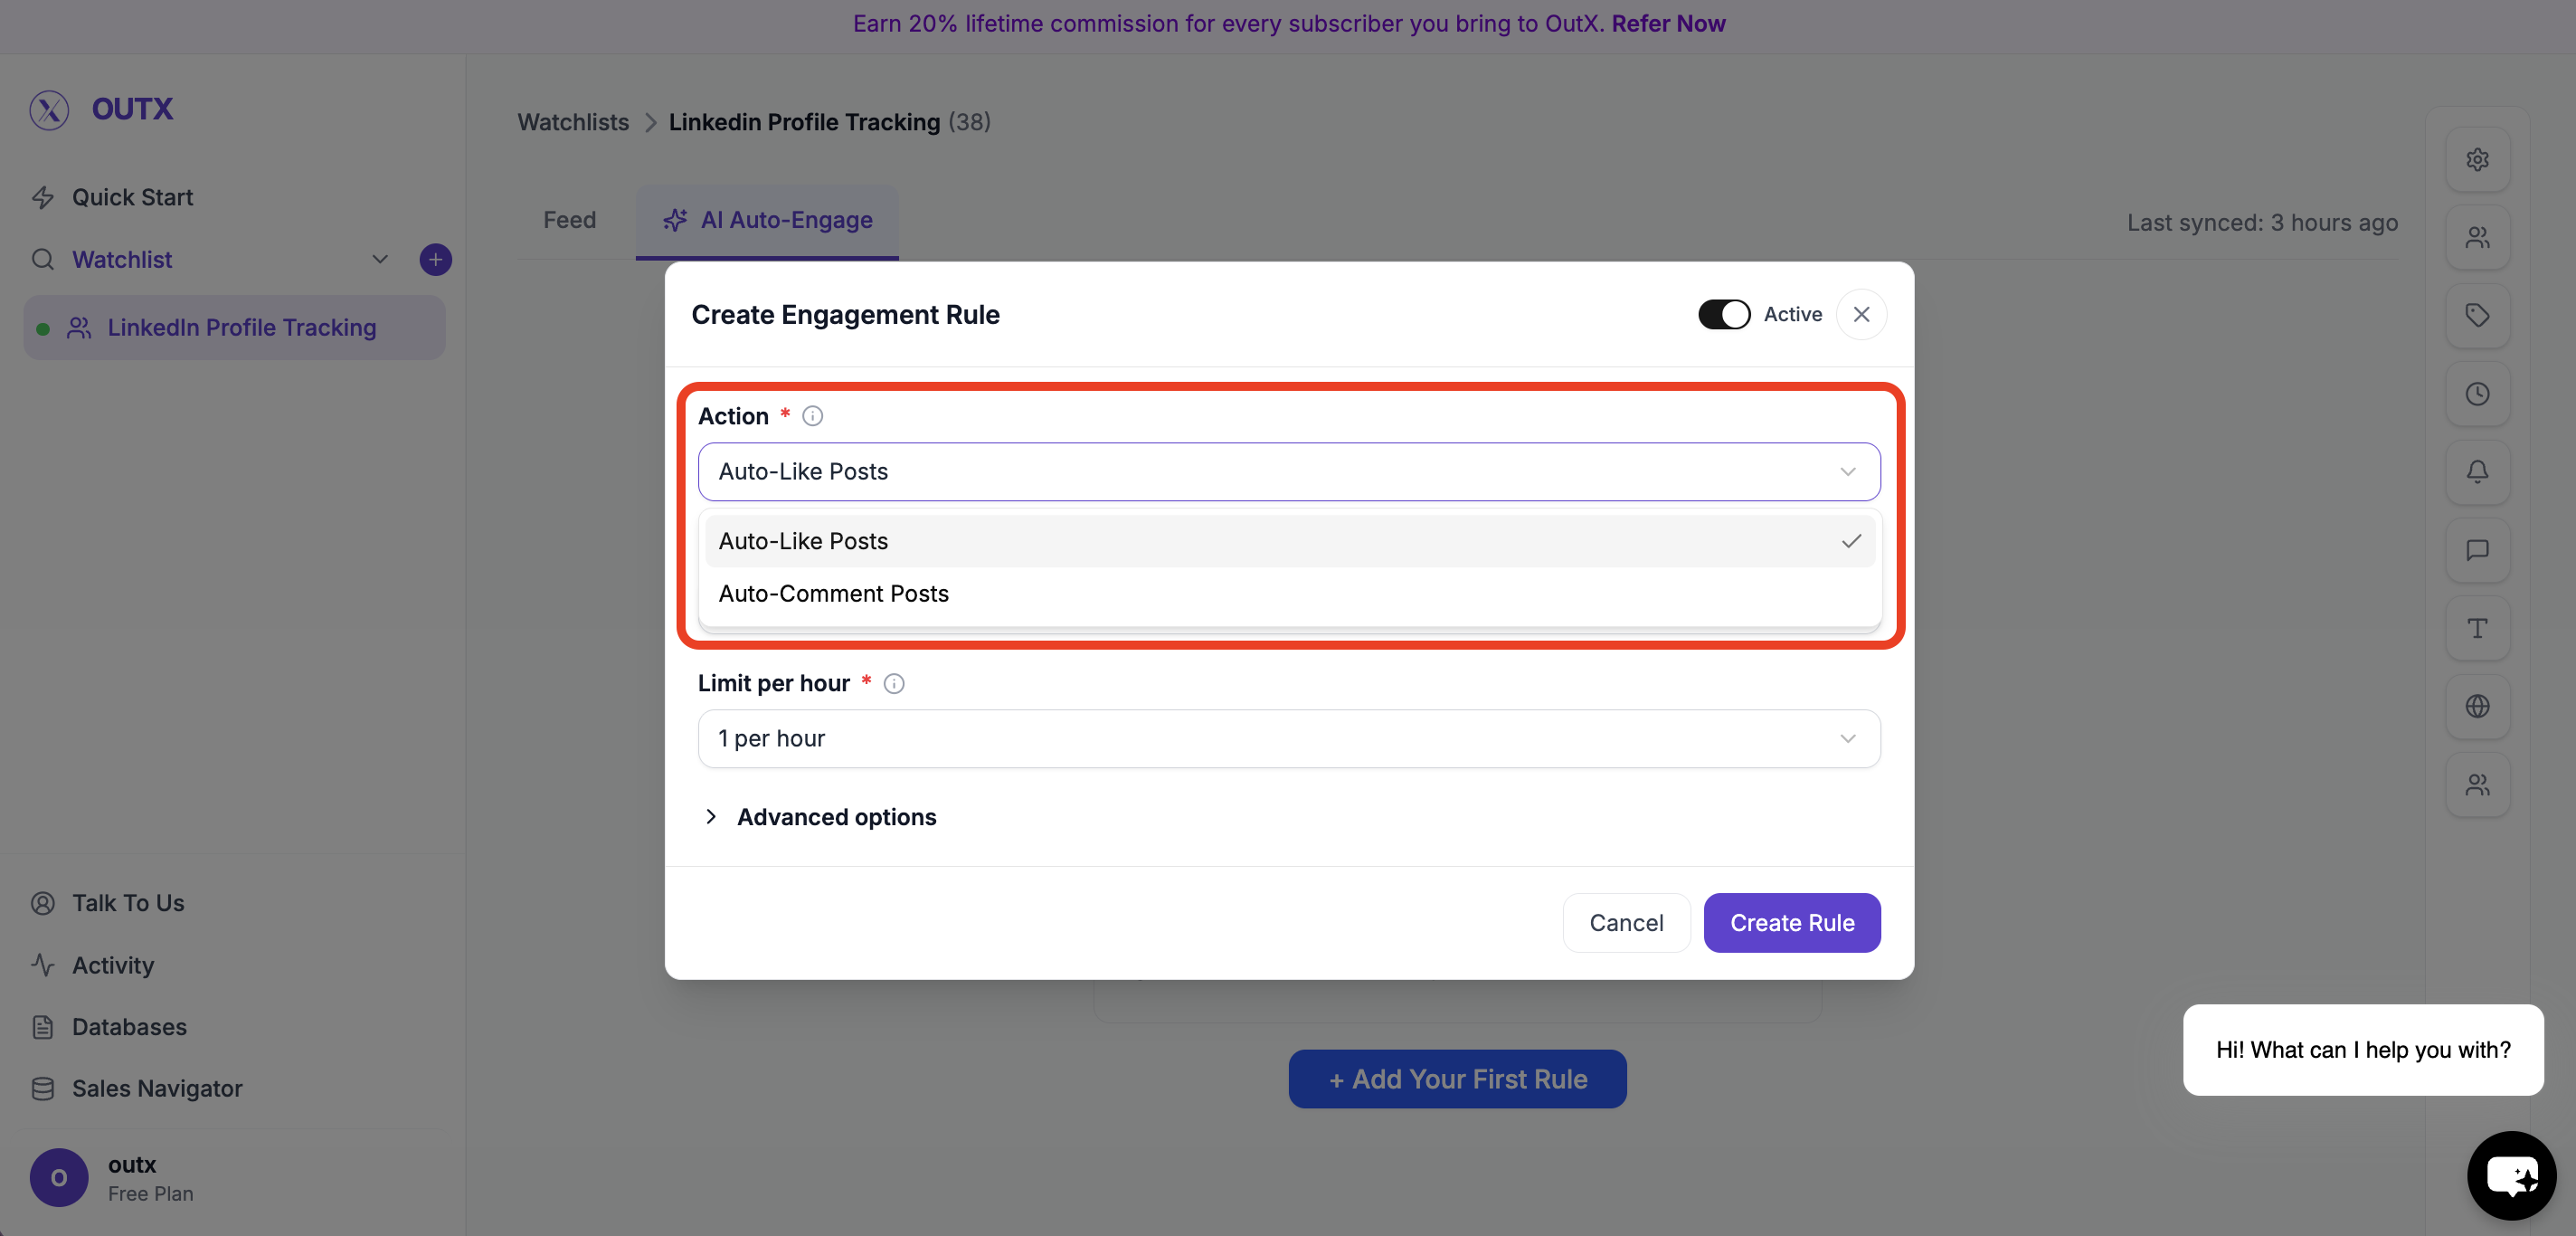
Once you choose a watchlist, click Add Your First Rule. You’ll see the Create Engagement Rule screen.Step 1: Choose an Action
Select what OutX.ai should do:- Auto-Like Posts
- Auto-Comment on Posts
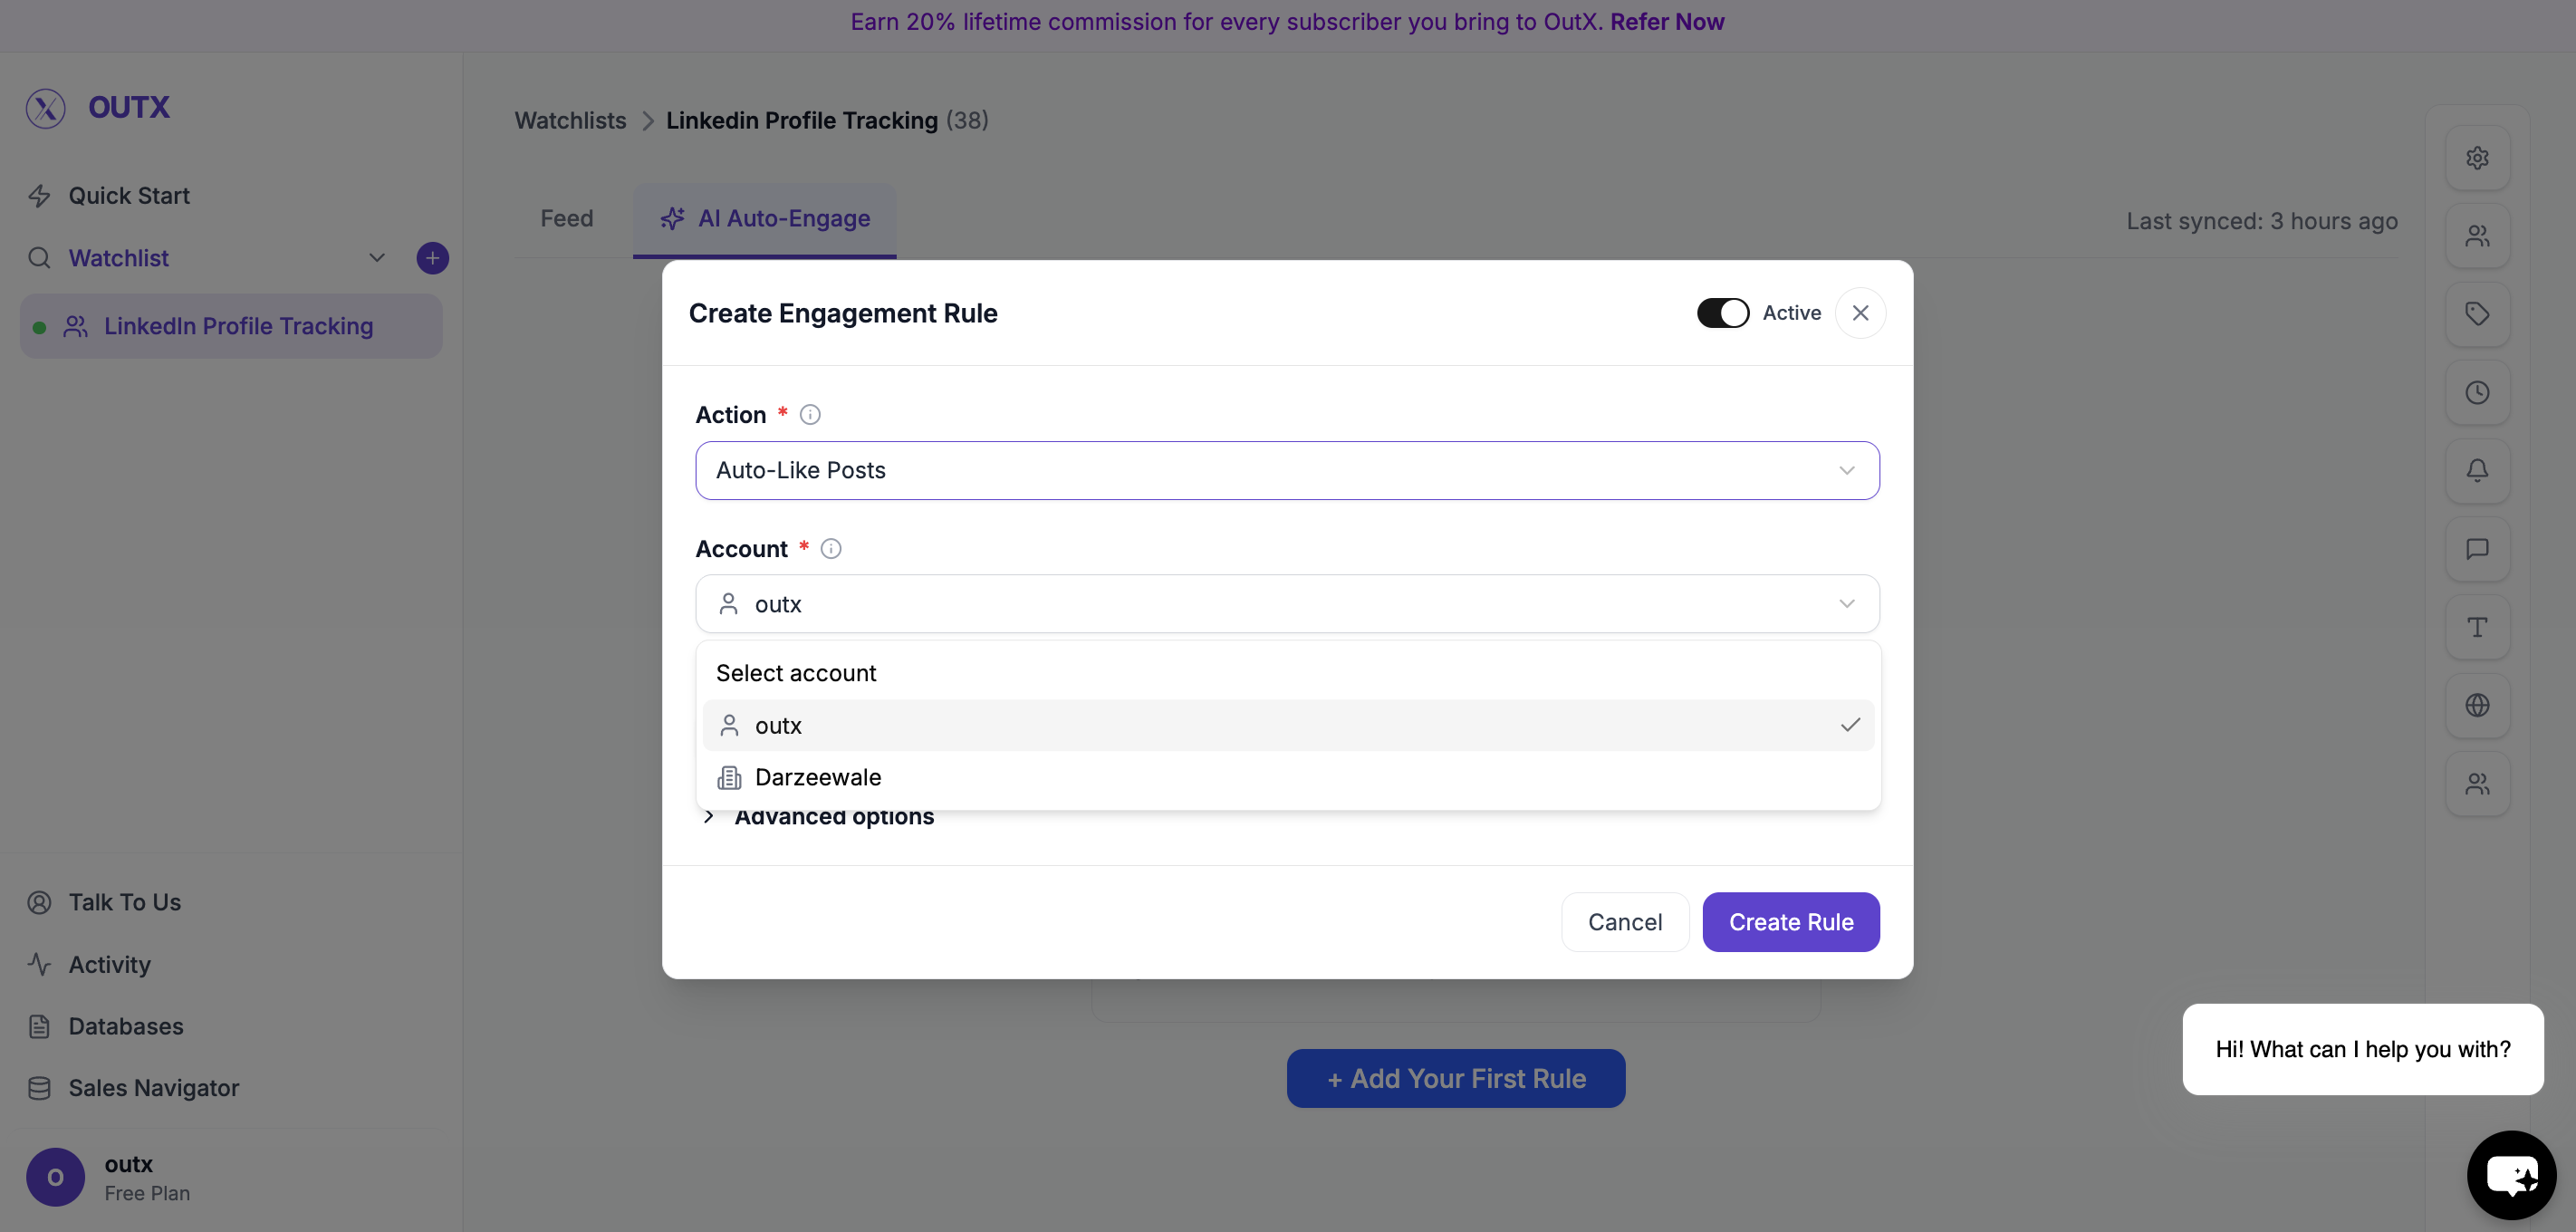
Step 2: Choose Account
Select which LinkedIn account will be used:- Your personal account
- Your company page (if connected)
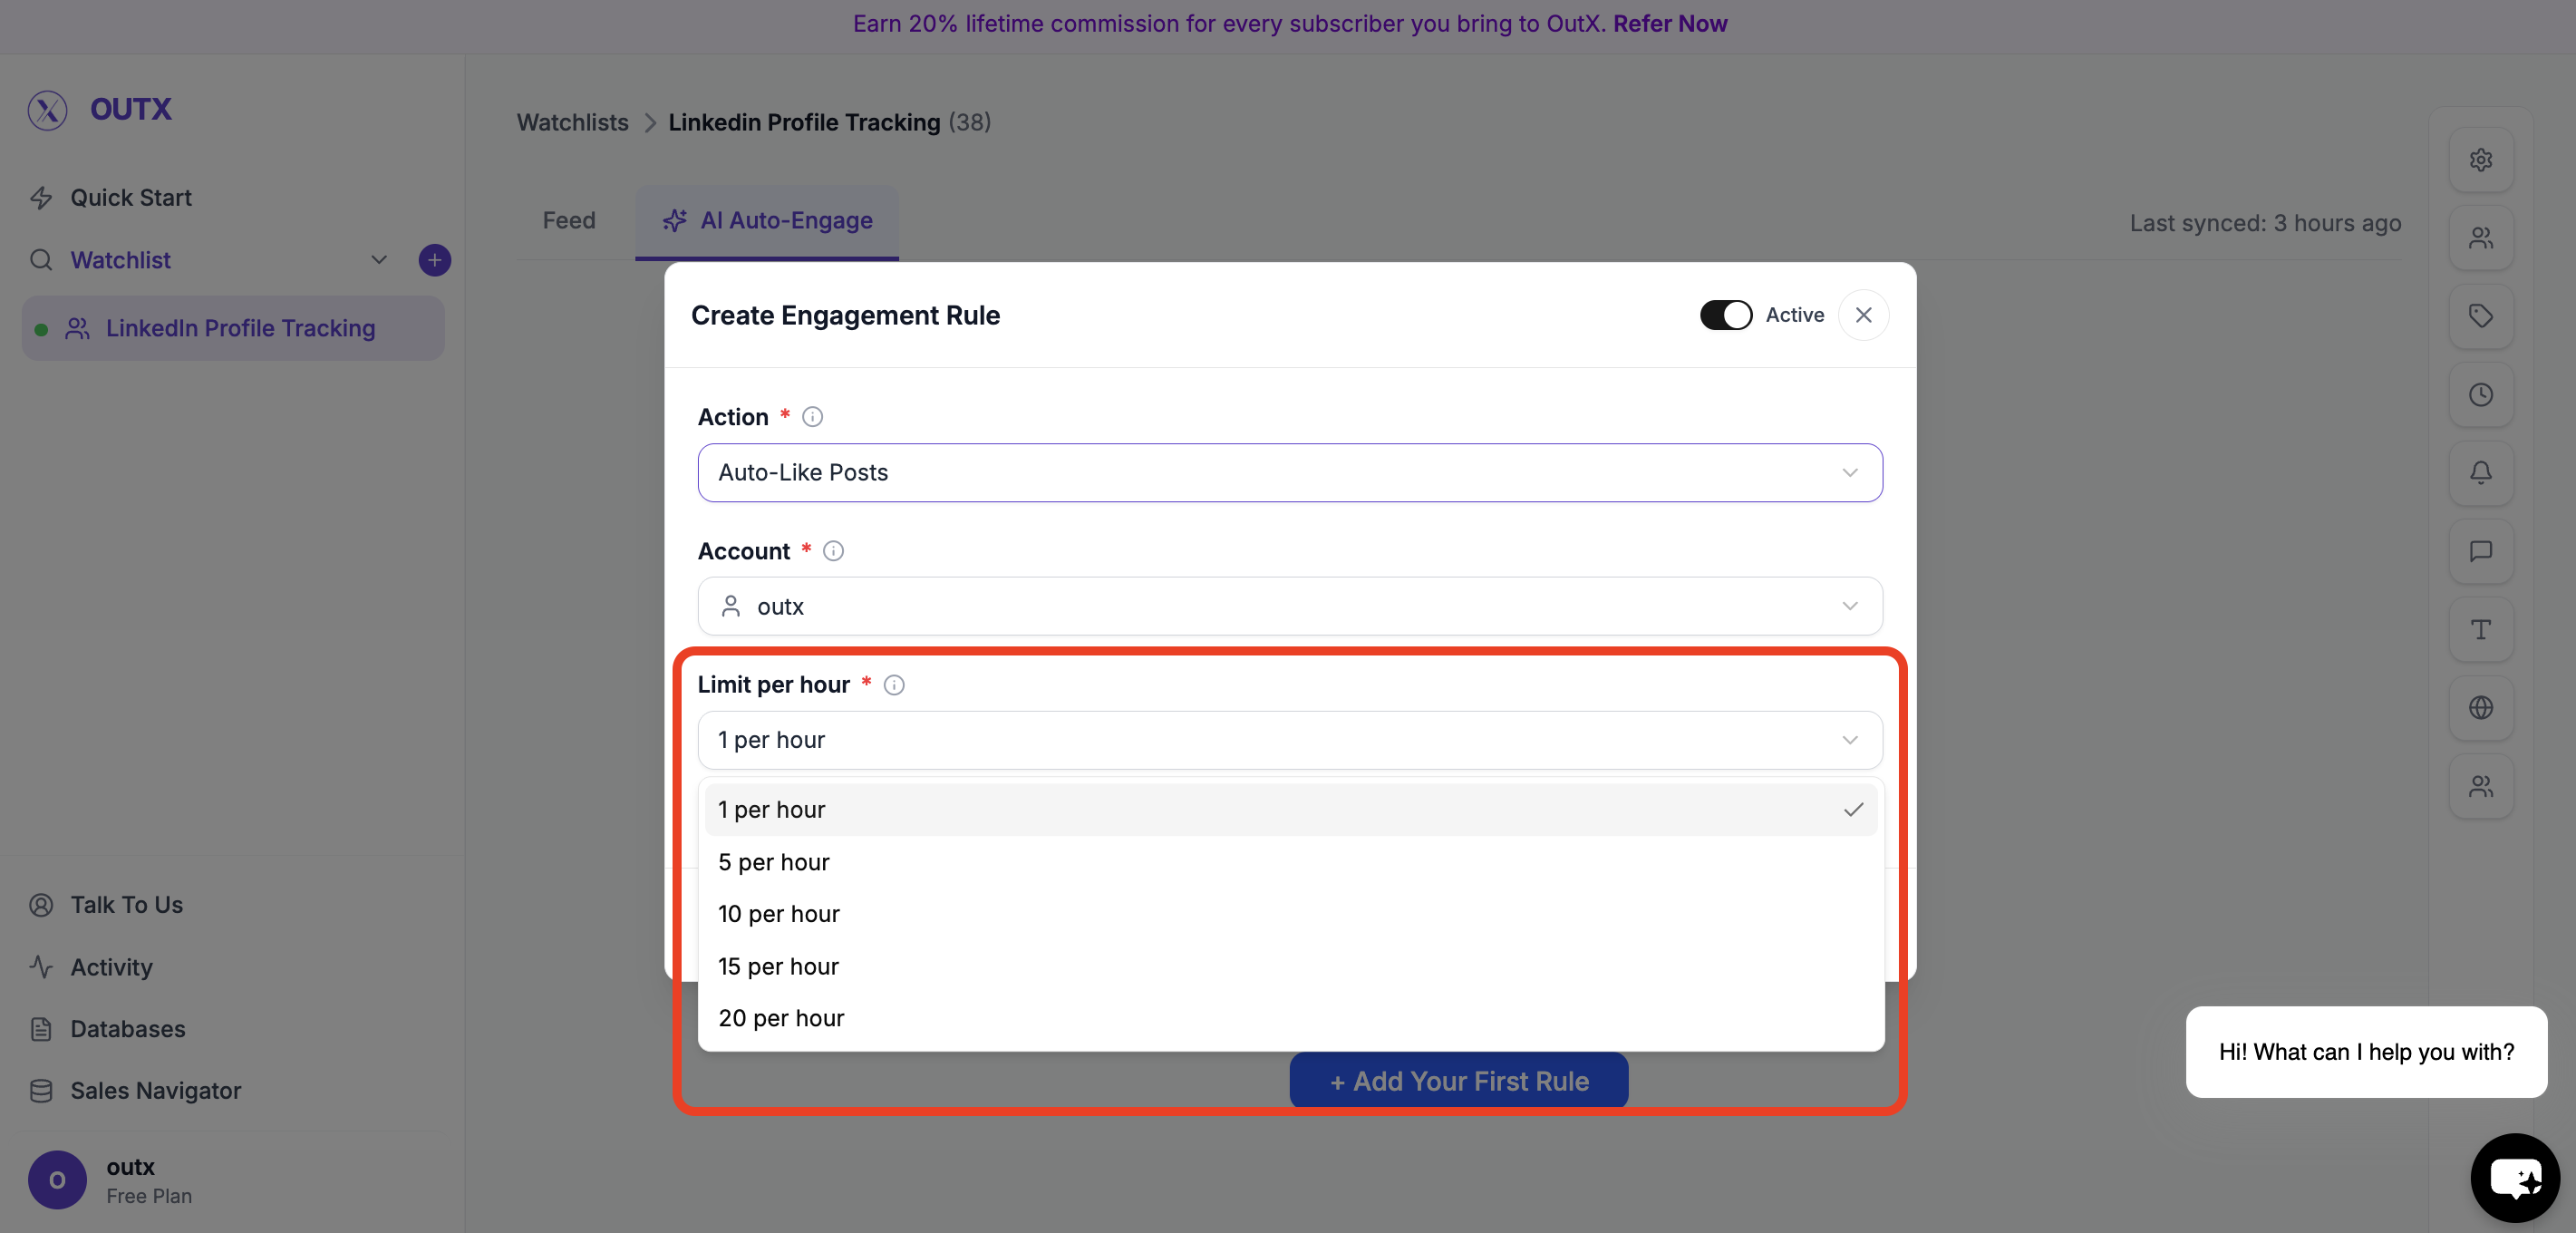
Step 3: Set Limit Per Hour
Control how many actions happen per hour. Examples:- 1 per hour
- 5 per hour
- 10 per hour
Step 4: Advanced Options (Optional)
Use advanced filters to control which posts qualify for engagement. You can refine engagement using:- Filter Intent – Engage only on posts matching selected intent types (e.g., buying intent, hiring, announcements)
- Filter Profiles – Limit engagement to specific profiles or profile categories
- Filter Seniority Levels – Engage only with posts from certain seniority levels (e.g., Founder, VP, Manager)
- Filter Post Types – Choose which types of posts to engage with (text posts, image posts, job posts, etc.)
- LinkedIn Posted At – Engage only on posts published within a selected time range
Step 5: Activate Rule
Turn the rule Active and click Create Rule. OutX.ai will start liking and/or commenting automatically based on your rule.What Happens After Setup
Once enabled:- OutX.ai monitors posts in real time
- Applies your engagement rules
- Likes or comments automatically
- Logs every action
You’re Live
In under 10 minutes, you’ve:- Chosen where to auto-engage
- Created engagement rules
- Enabled automation
- Started building your LinkedIn presence
Frequently Asked Questions
Can I auto-engage from my company page?
Can I auto-engage from my company page?
Yes. When creating an engagement rule, you can select your company page as the account to use. Comments and likes will then be posted as the company rather than your personal profile.
What are safe auto-engagement limits?
What are safe auto-engagement limits?
Start conservatively with 1-5 likes per hour and 1-3 comments per hour. These limits help keep your activity looking natural and reduce the risk of LinkedIn flagging your account. You can adjust limits over time as you monitor results.