Auto Engagement via Watchlists
When Auto Engagement is enabled on a watchlist, OutX.ai monitors new posts in real time.- Posts are picked only if they match your keywords or tracked profiles
- You can auto-like, auto-comment, or both
- Engagement happens shortly after the post goes live, not days later
- This helps you stay visible without checking LinkedIn all day
Step 1: Open a Watchlist
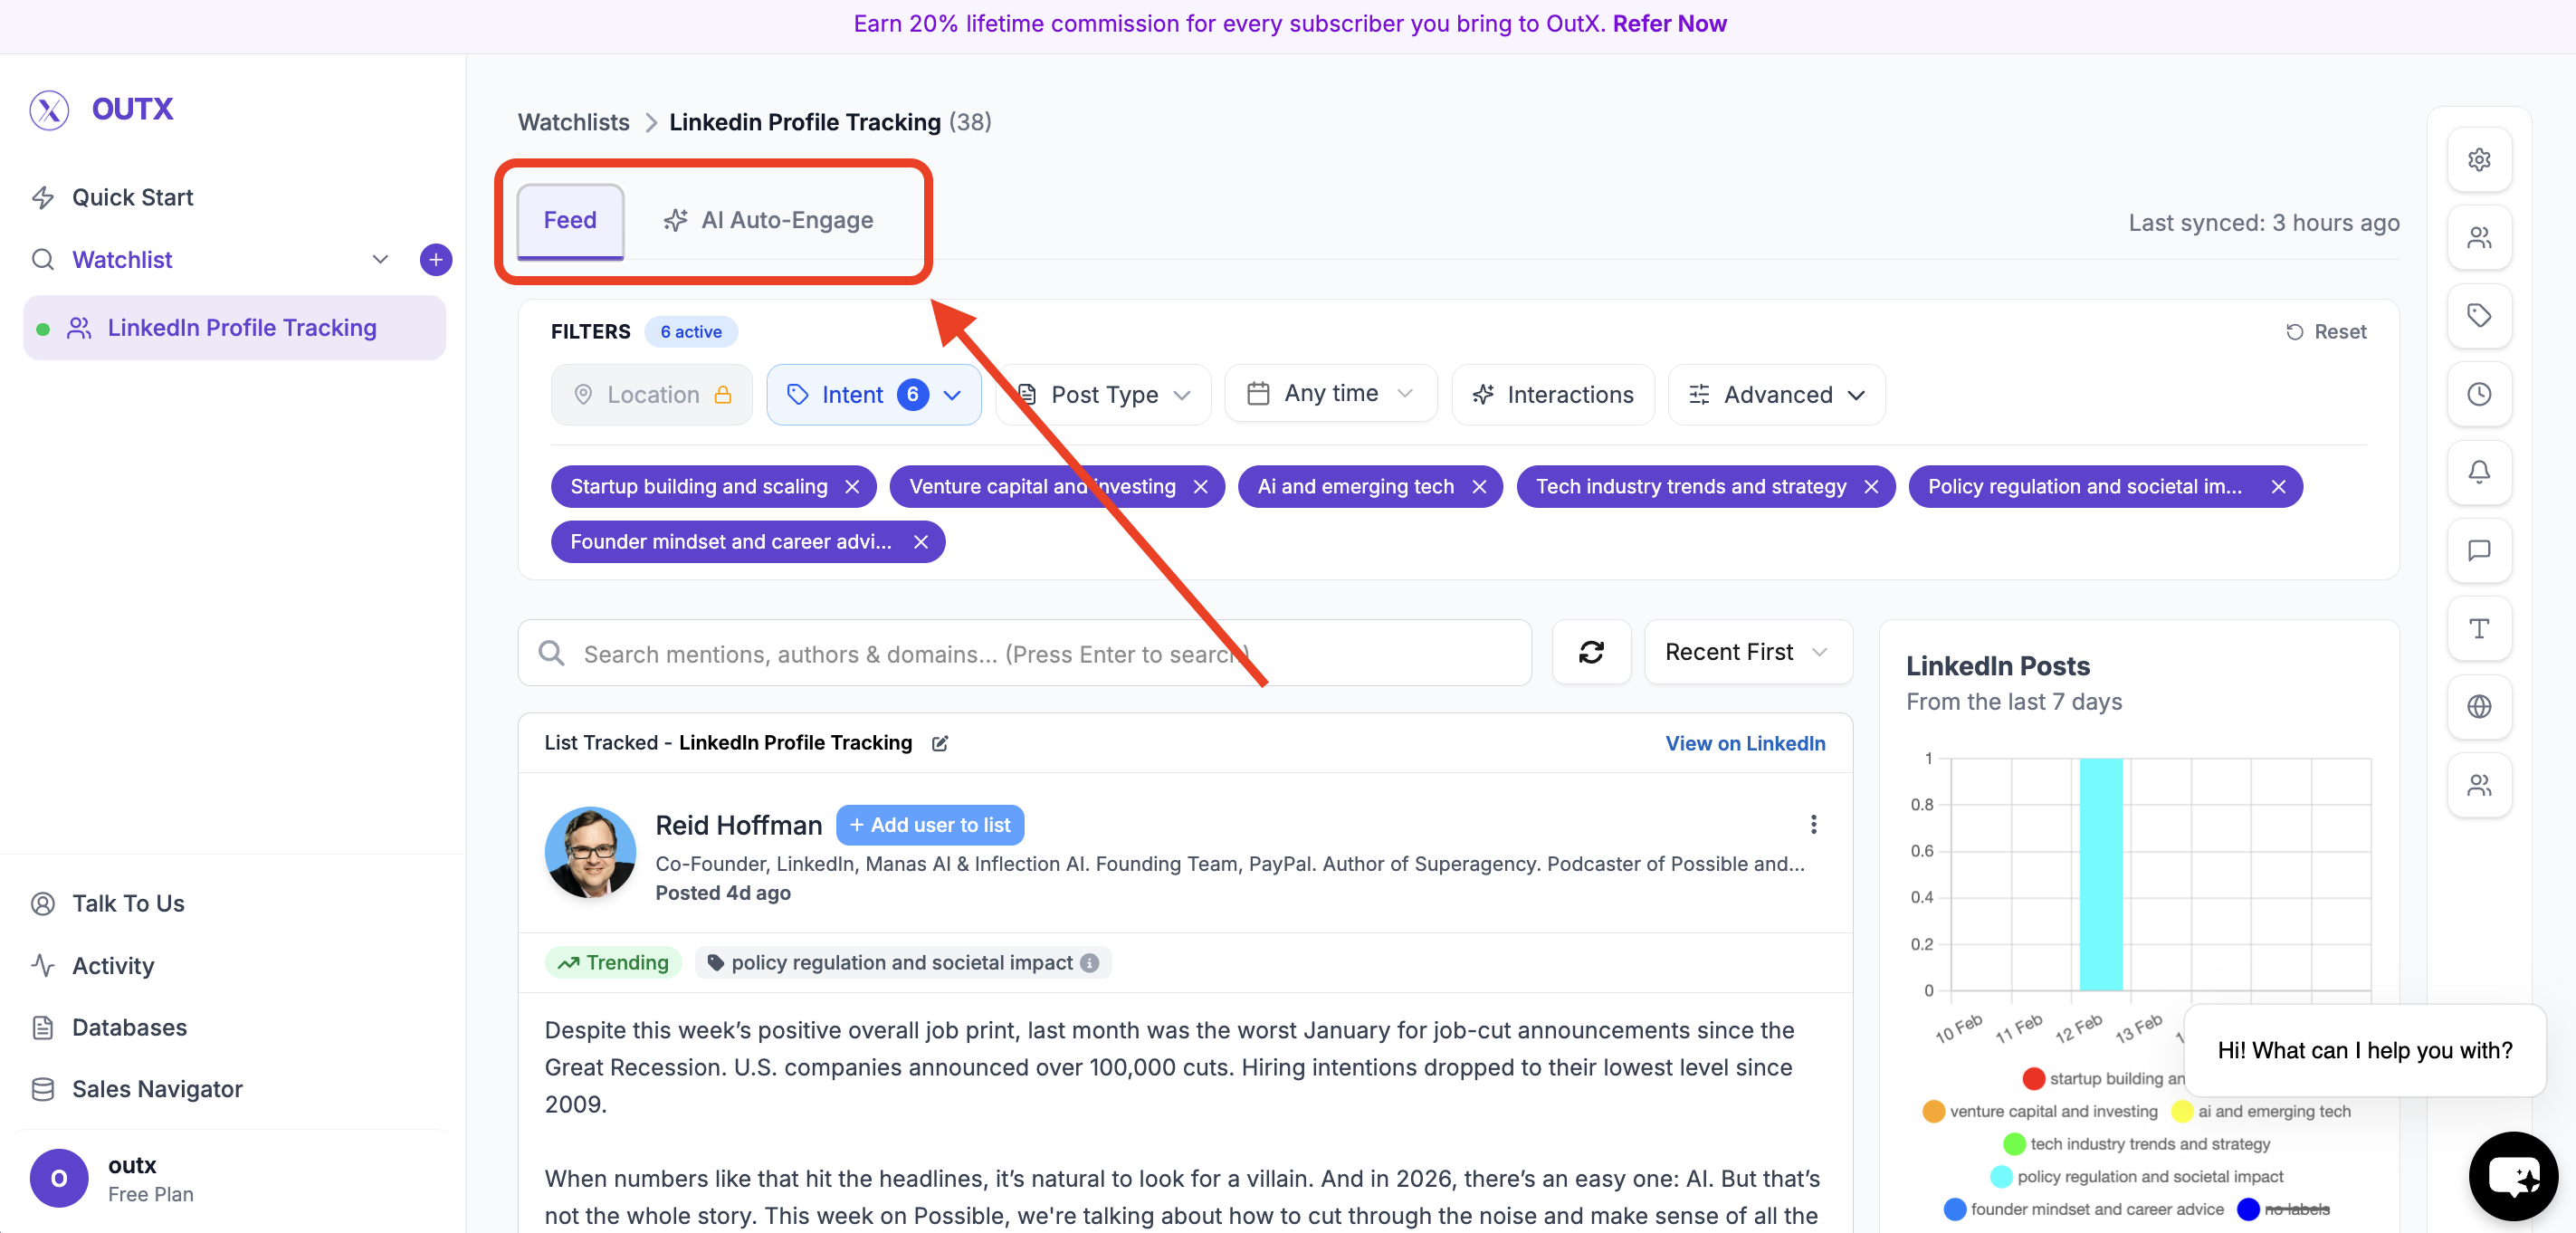
Auto Engagement always runs on a watchlist.- Go to Watchlists
- Click AI Auto-Engage
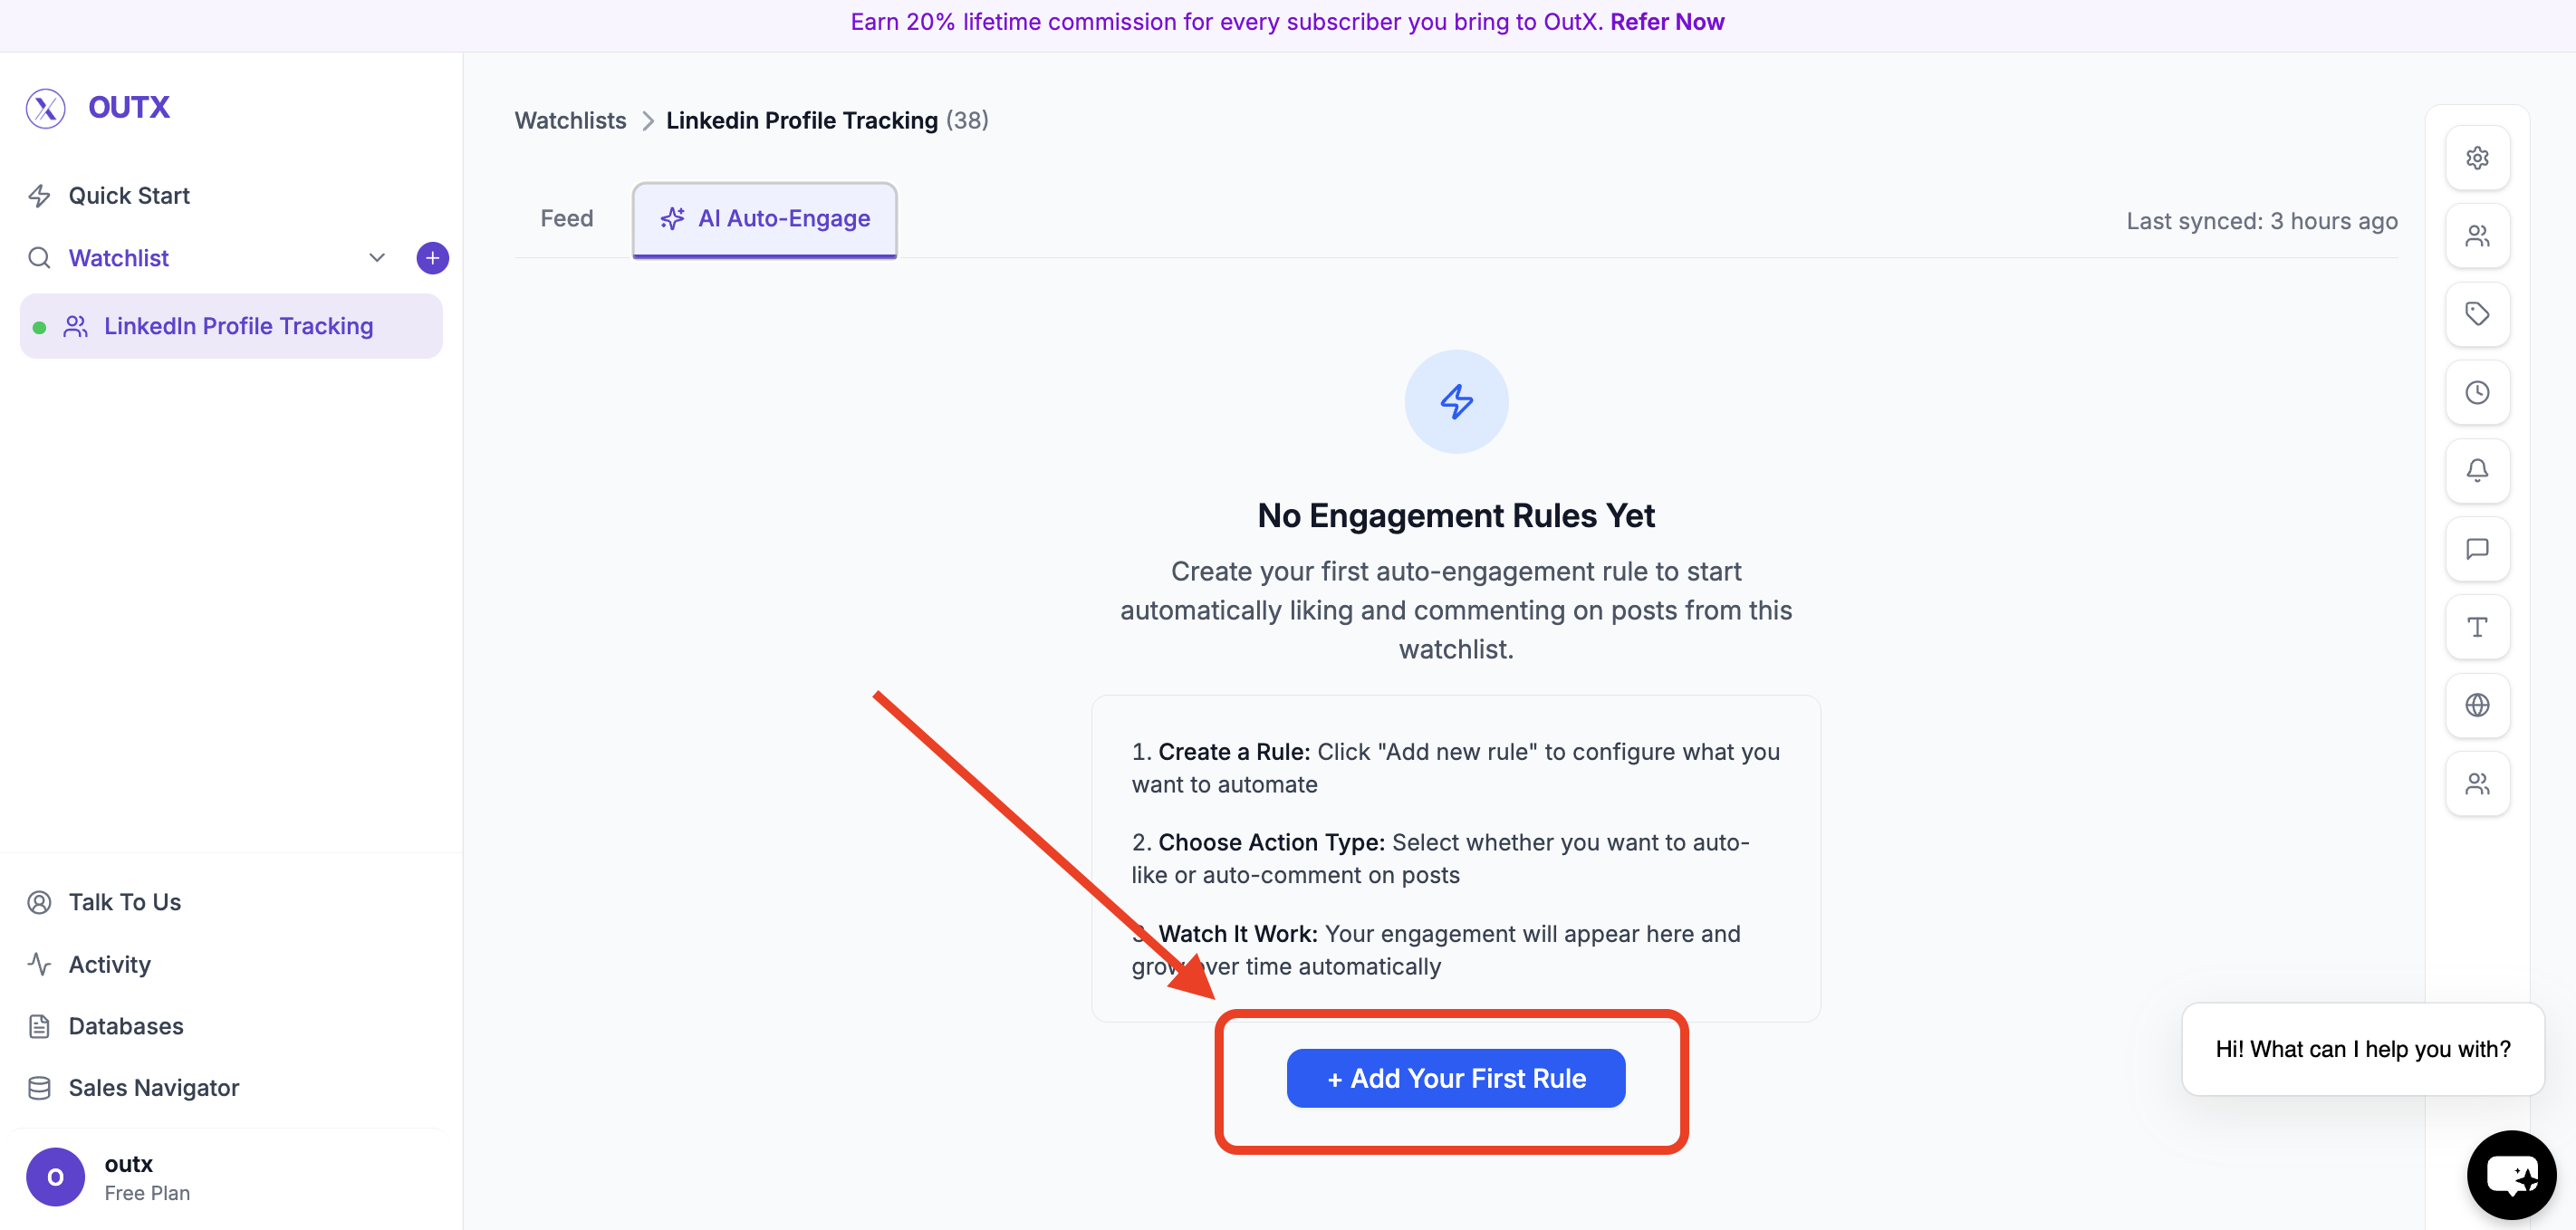
- Click Add Your First Rule
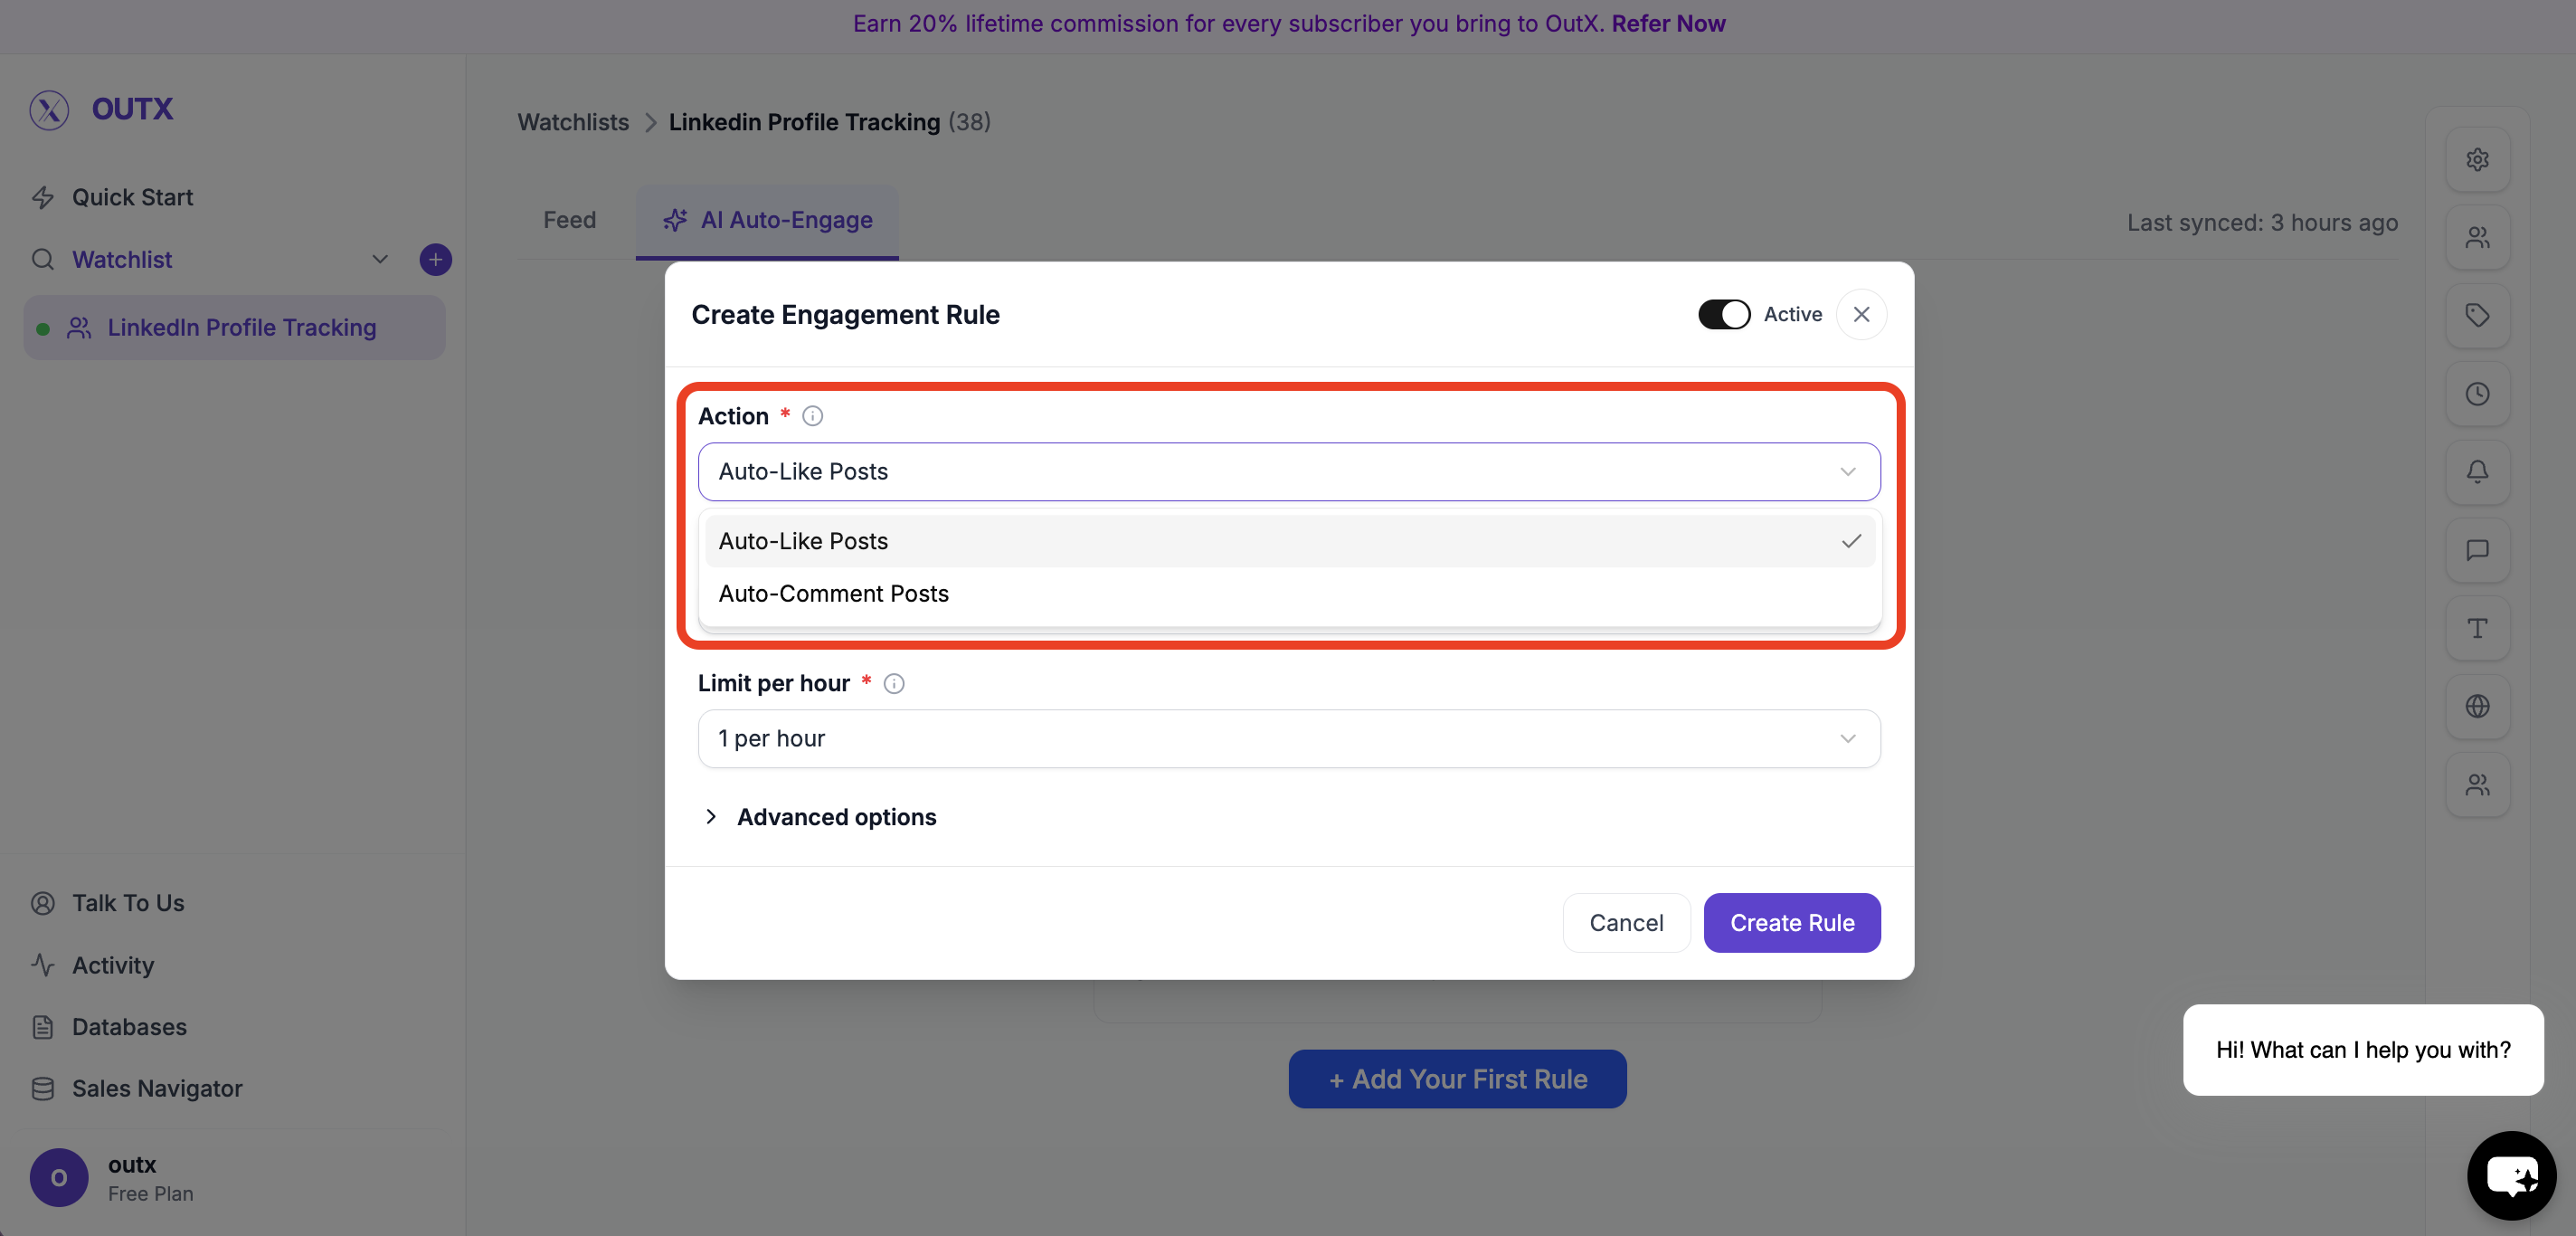
Step 2: Create Engagement Rule
You’ll see the Create Engagement Rule modal. This is where you define how OutX.ai should engage.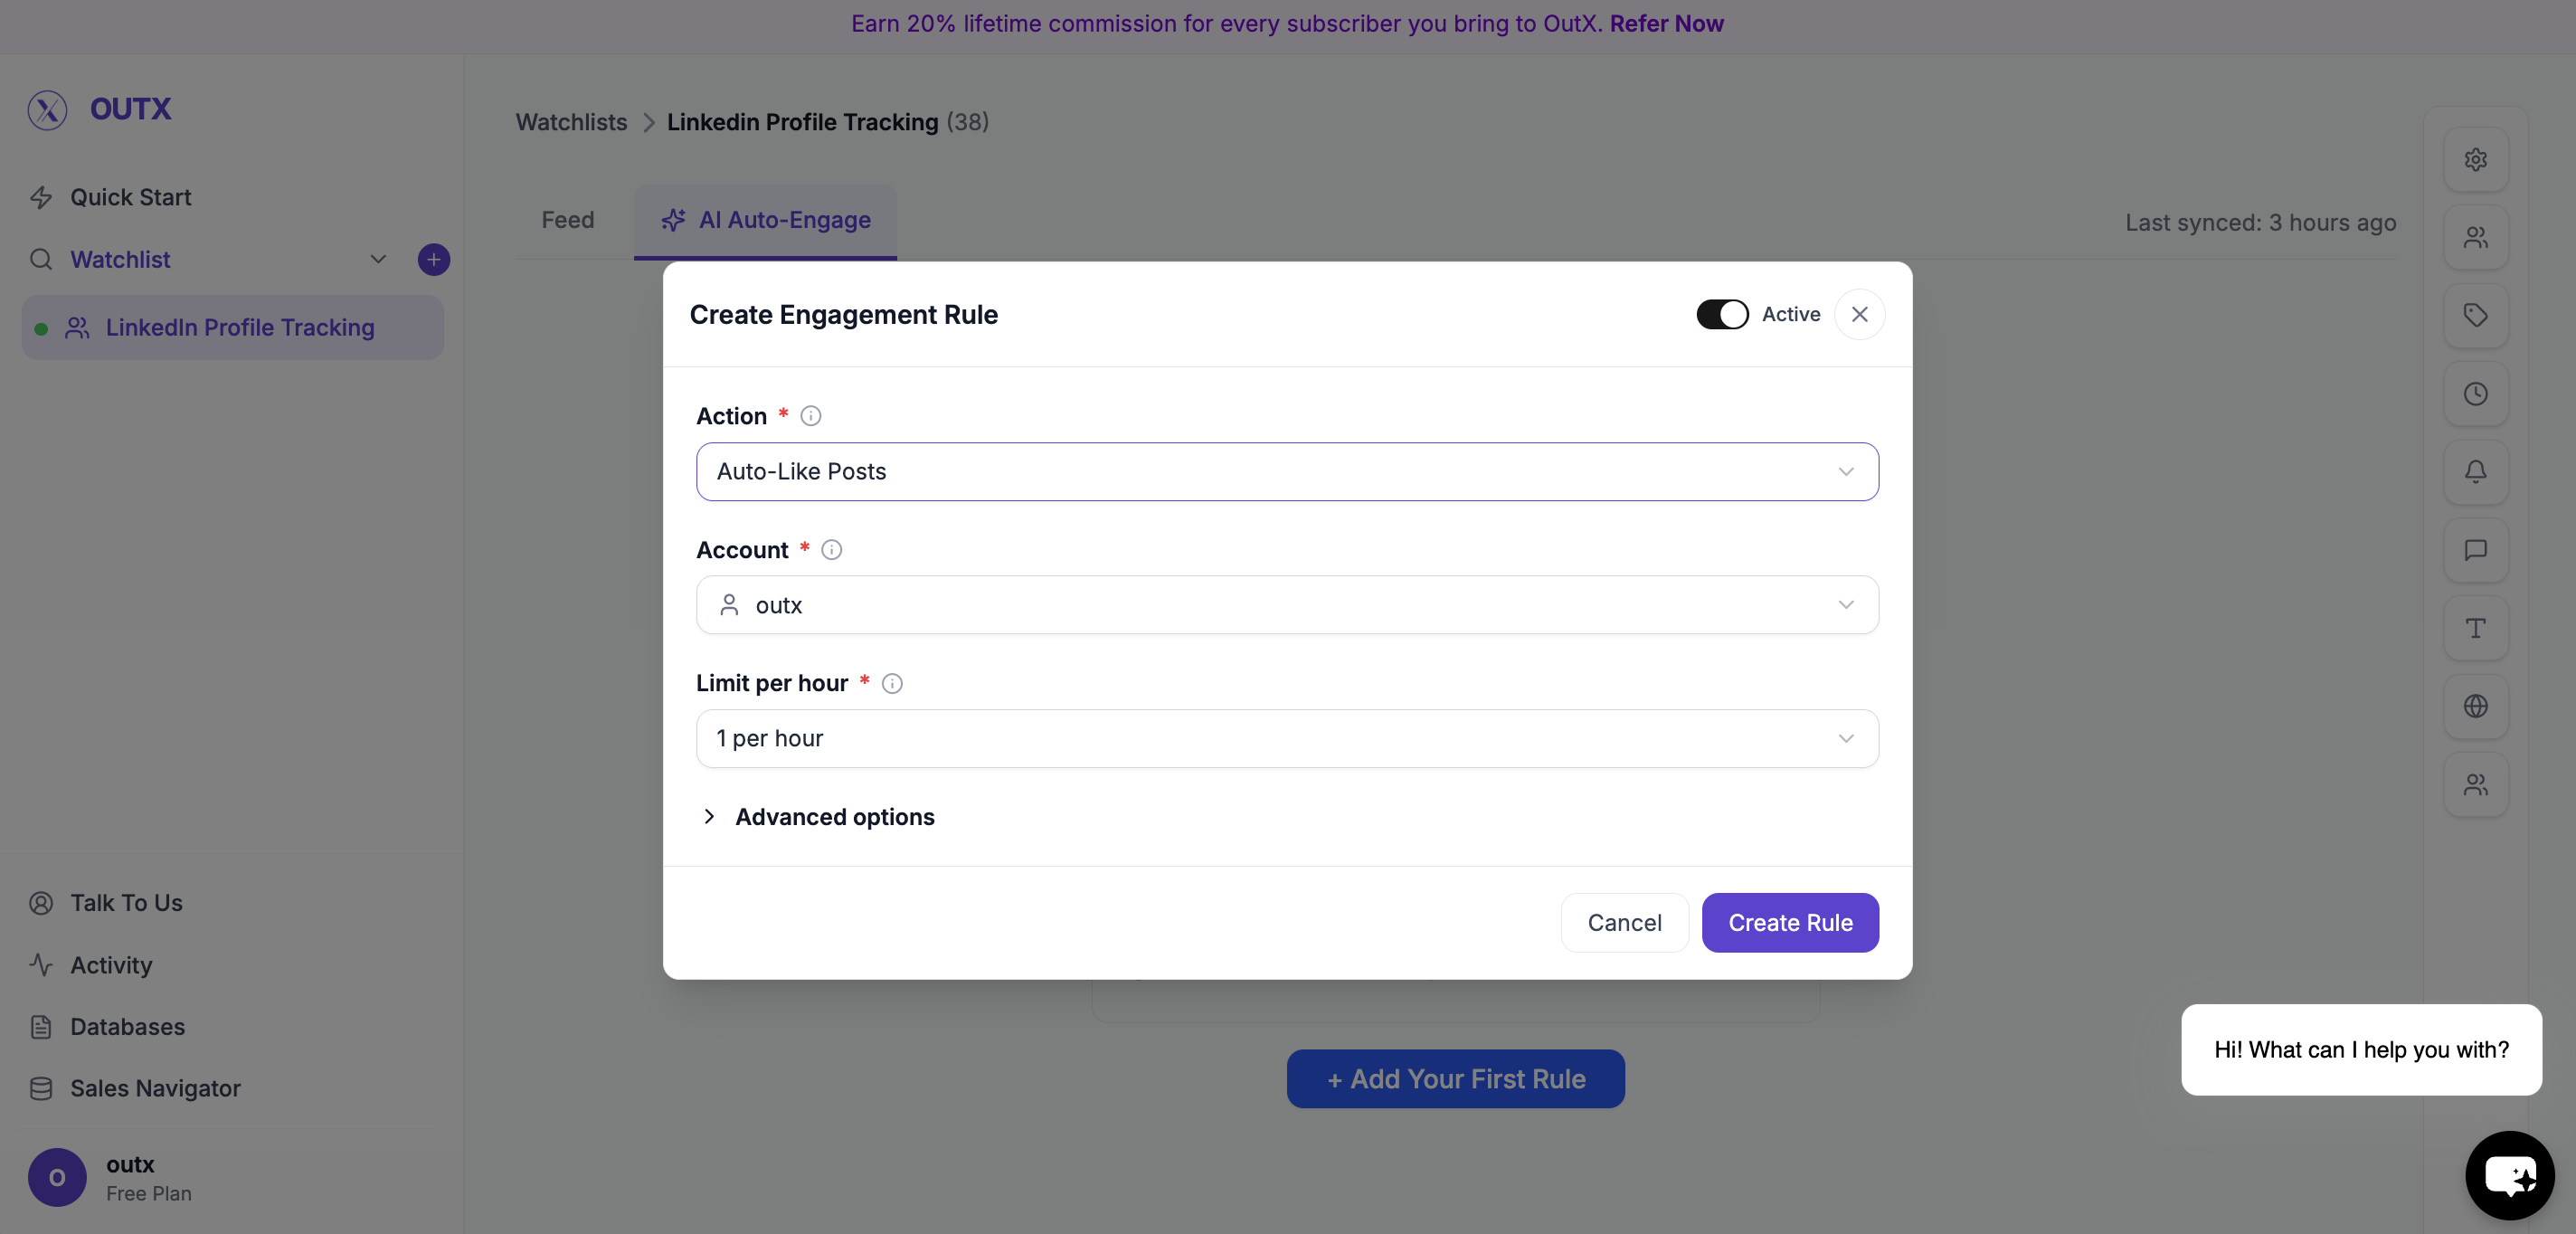
Choose Action
Select what OutX.ai should do:- Auto-Like Posts
- Auto-Comment on Posts
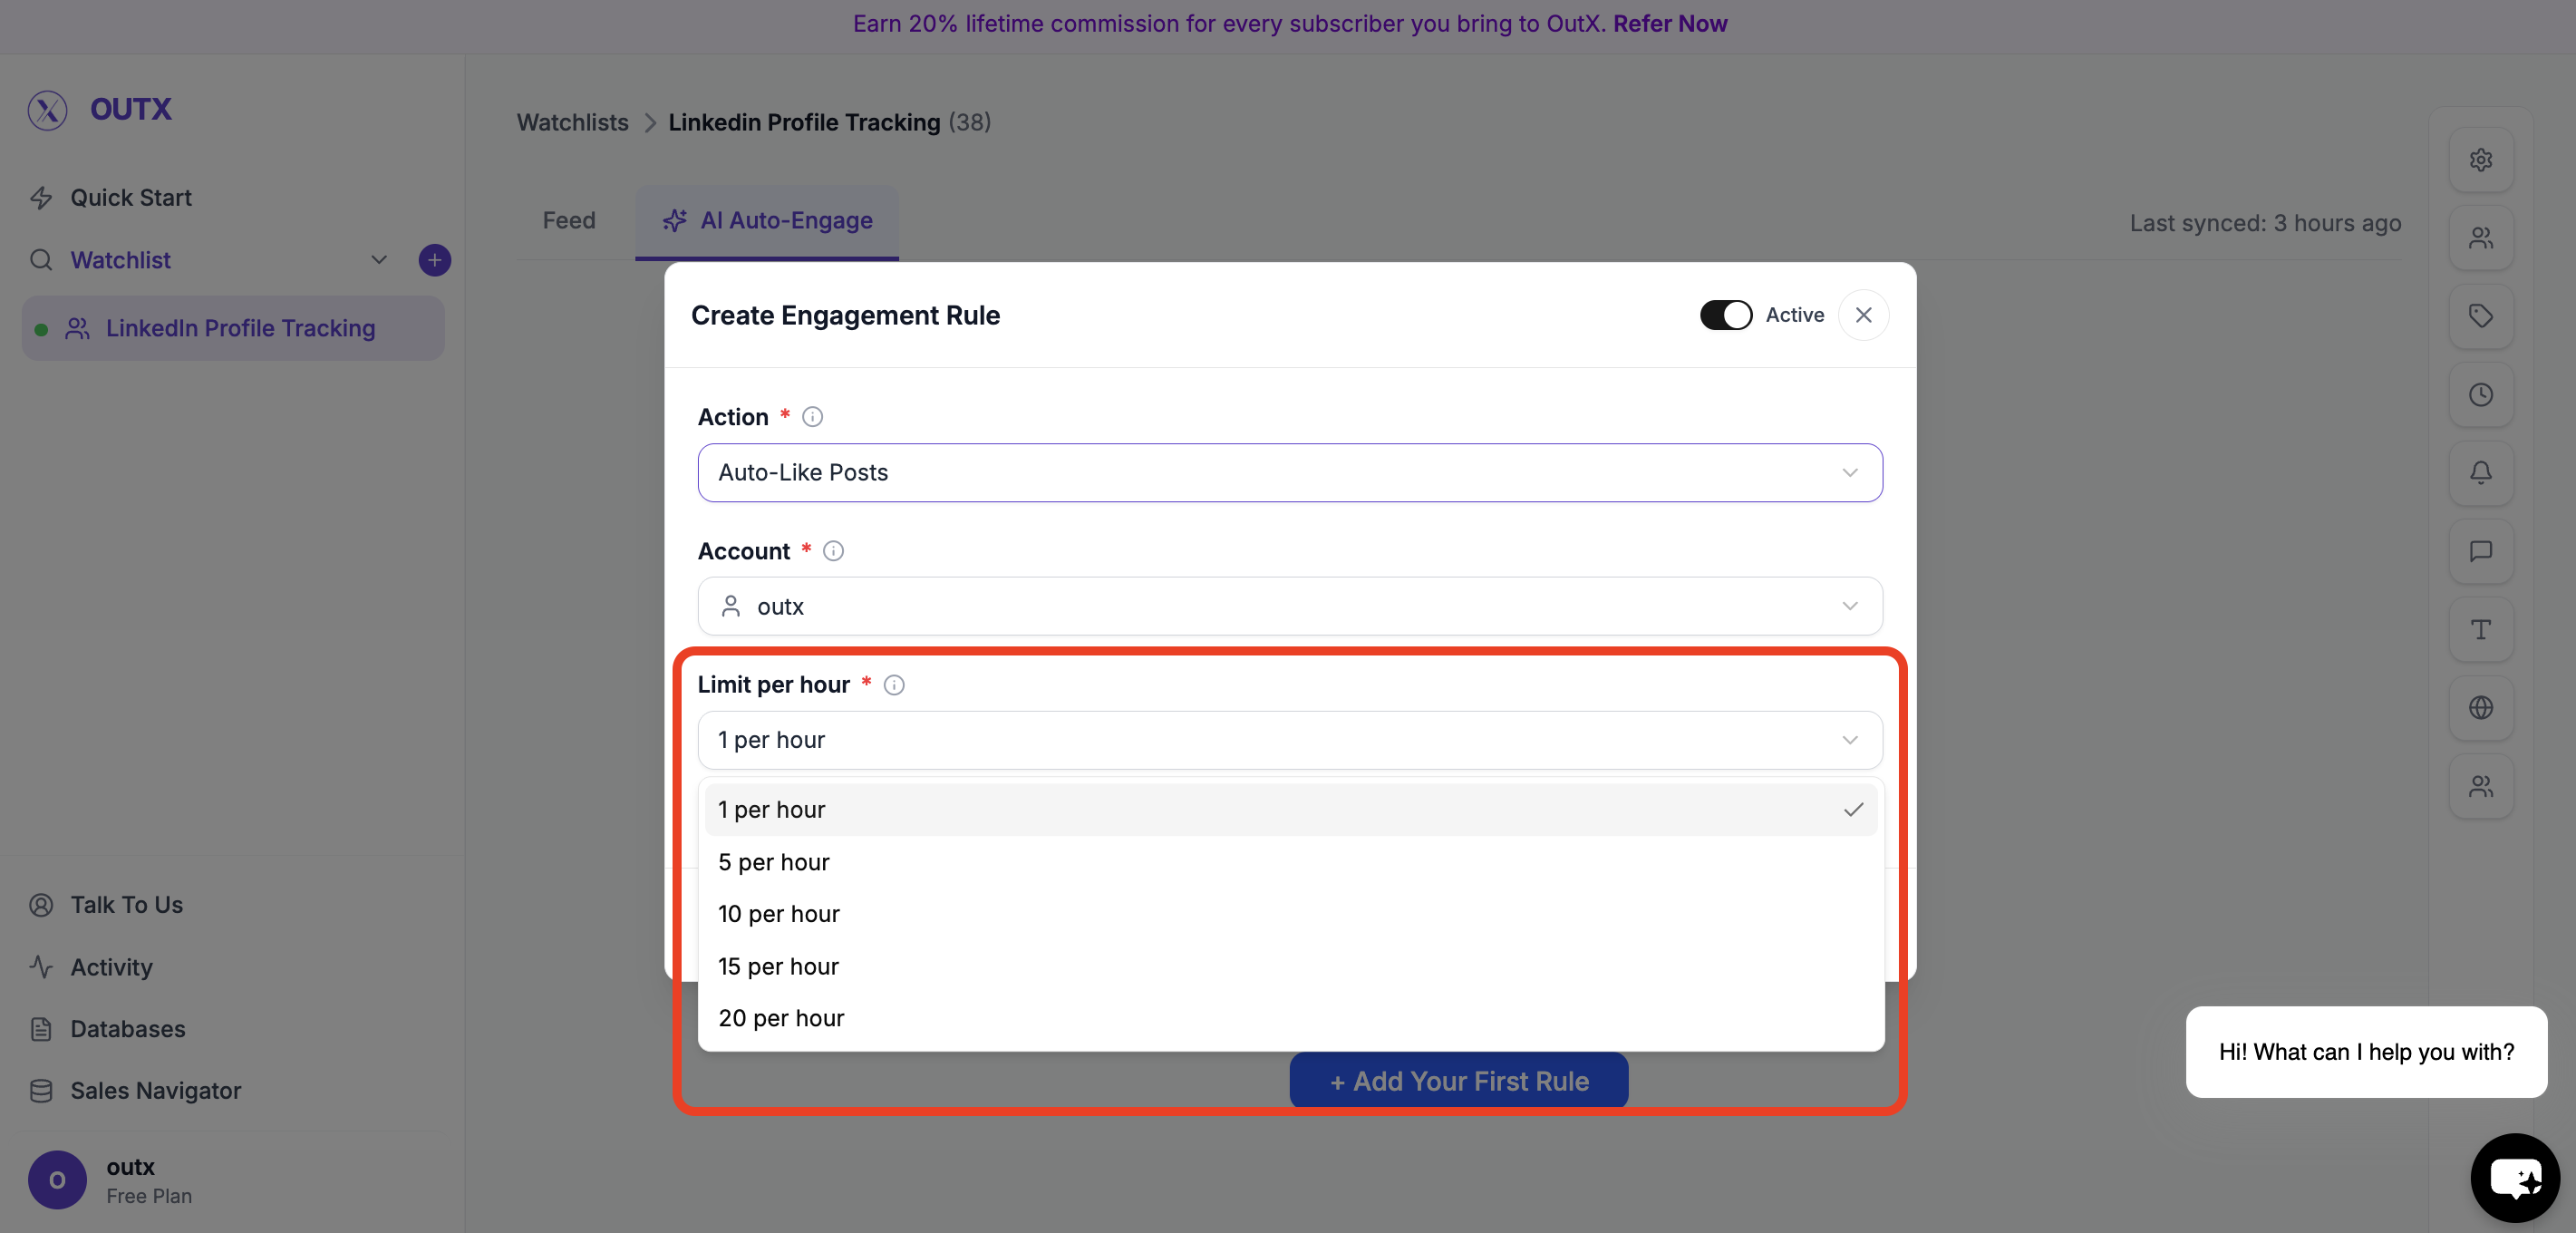
Choose Account
Select which LinkedIn account will be used:- Your personal LinkedIn account
- Your connected company page

Set Limit Per Hour
Control how many actions can happen per hour. Examples:- 1 per hour
- 5 per hour
- 10 per hour
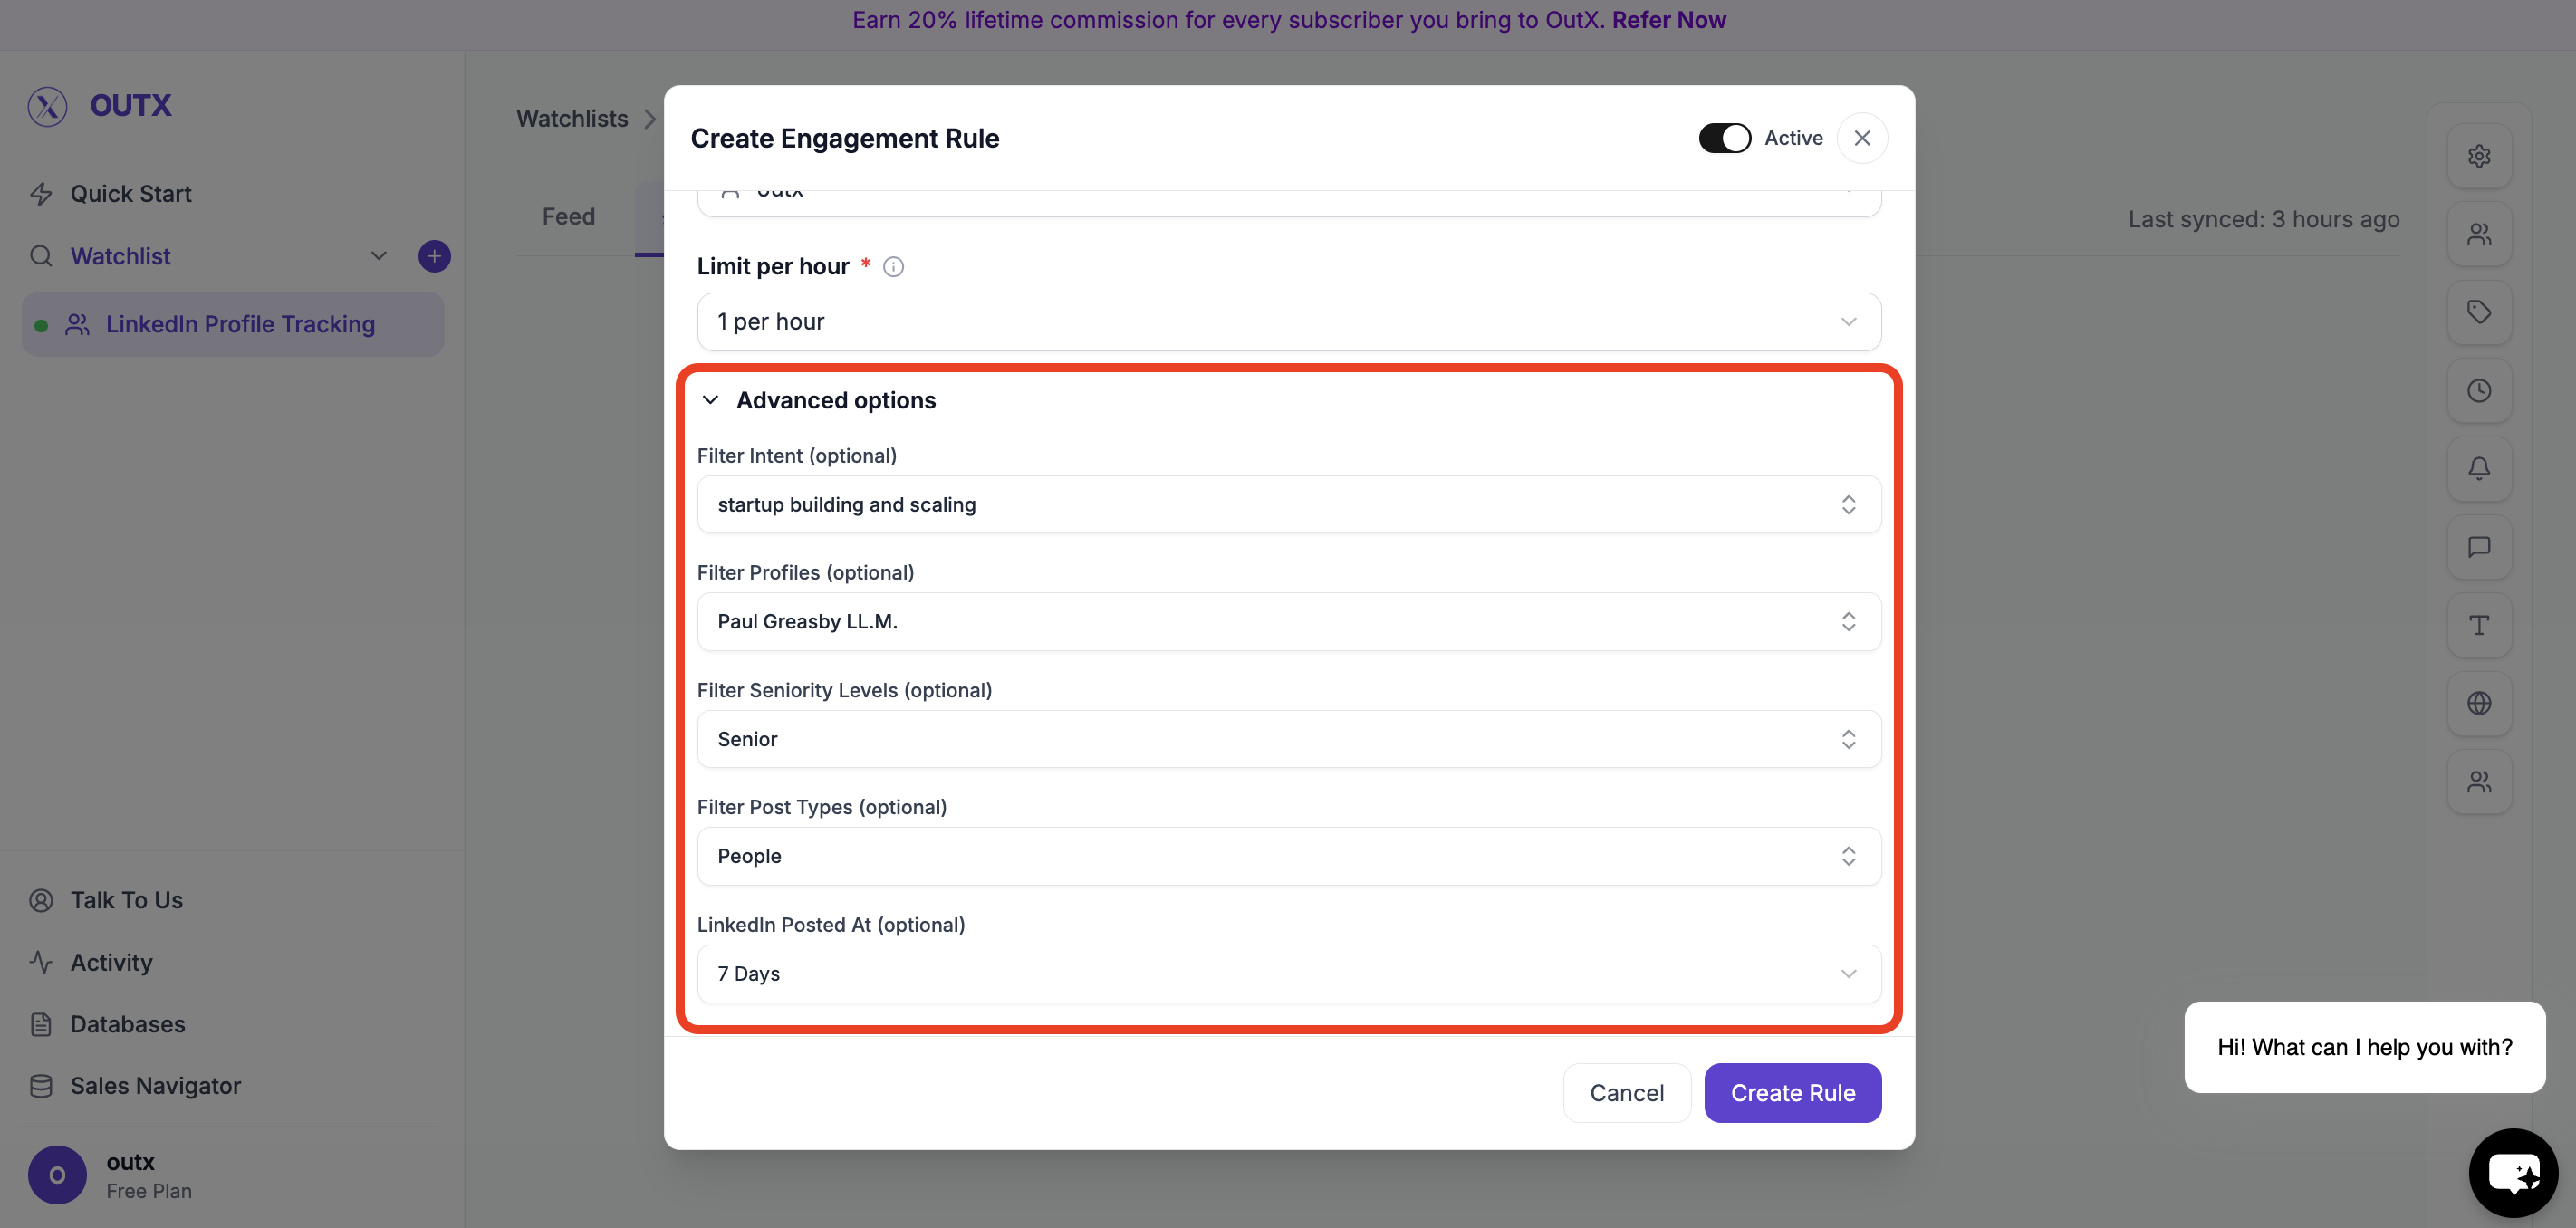
Step 4: Advanced Options (Optional)
Use advanced filters to control which posts qualify for engagement. You can refine engagement using:- Filter Intent – Engage only on posts matching selected intent types (e.g., buying intent, hiring, announcements)
- Filter Profiles – Limit engagement to specific profiles or profile categories
- Filter Seniority Levels – Engage only with posts from certain seniority levels (e.g., Founder, VP, Manager)
- Filter Post Types – Choose which types of posts to engage with (text posts, image posts, job posts, etc.)
- LinkedIn Posted At – Engage only on posts published within a selected time range
Step 5: Activate Rule
Turn the rule Active and click Create Rule. OutX.ai will start liking and/or commenting automatically based on your rule.Manual Engagement with AI Comments
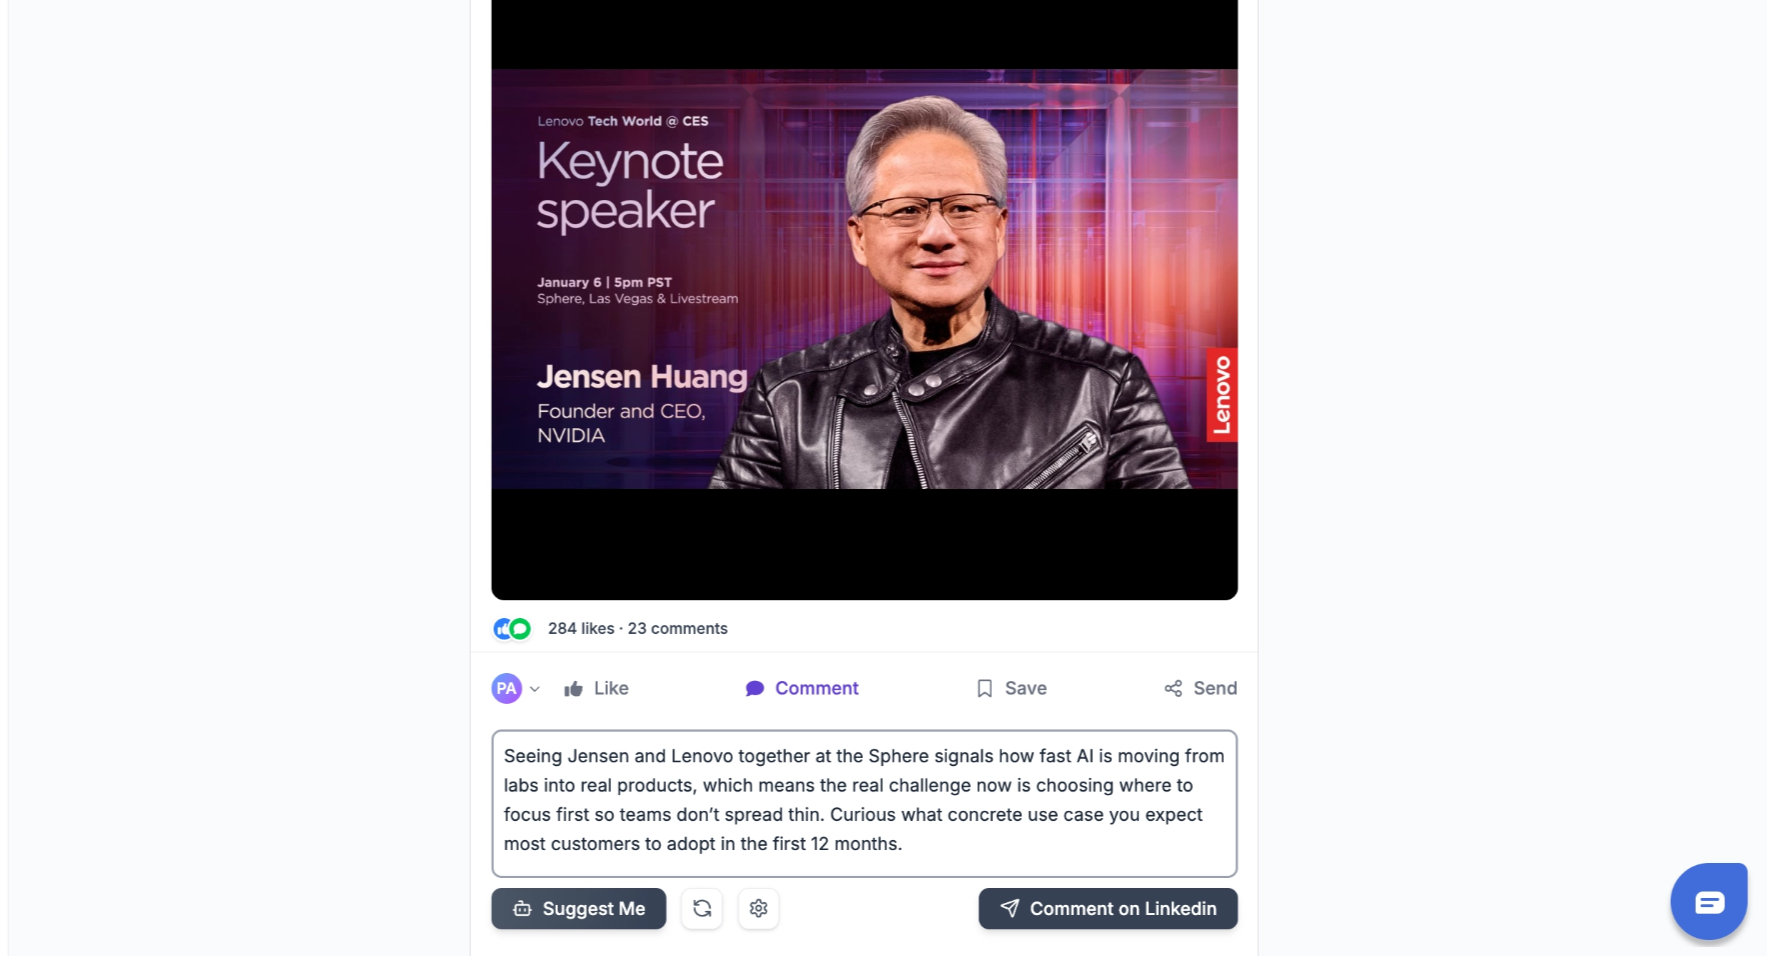
For posts that matter more, you can engage manually with help from AI.- View all tracked posts in one place
- Click Generate Comment to get a relevant, natural reply
- Edit the comment before posting
- Post only when you are confident with the message
Step-by-Step: Comment Manually Using AI
Step 1: Open a Tracked Post
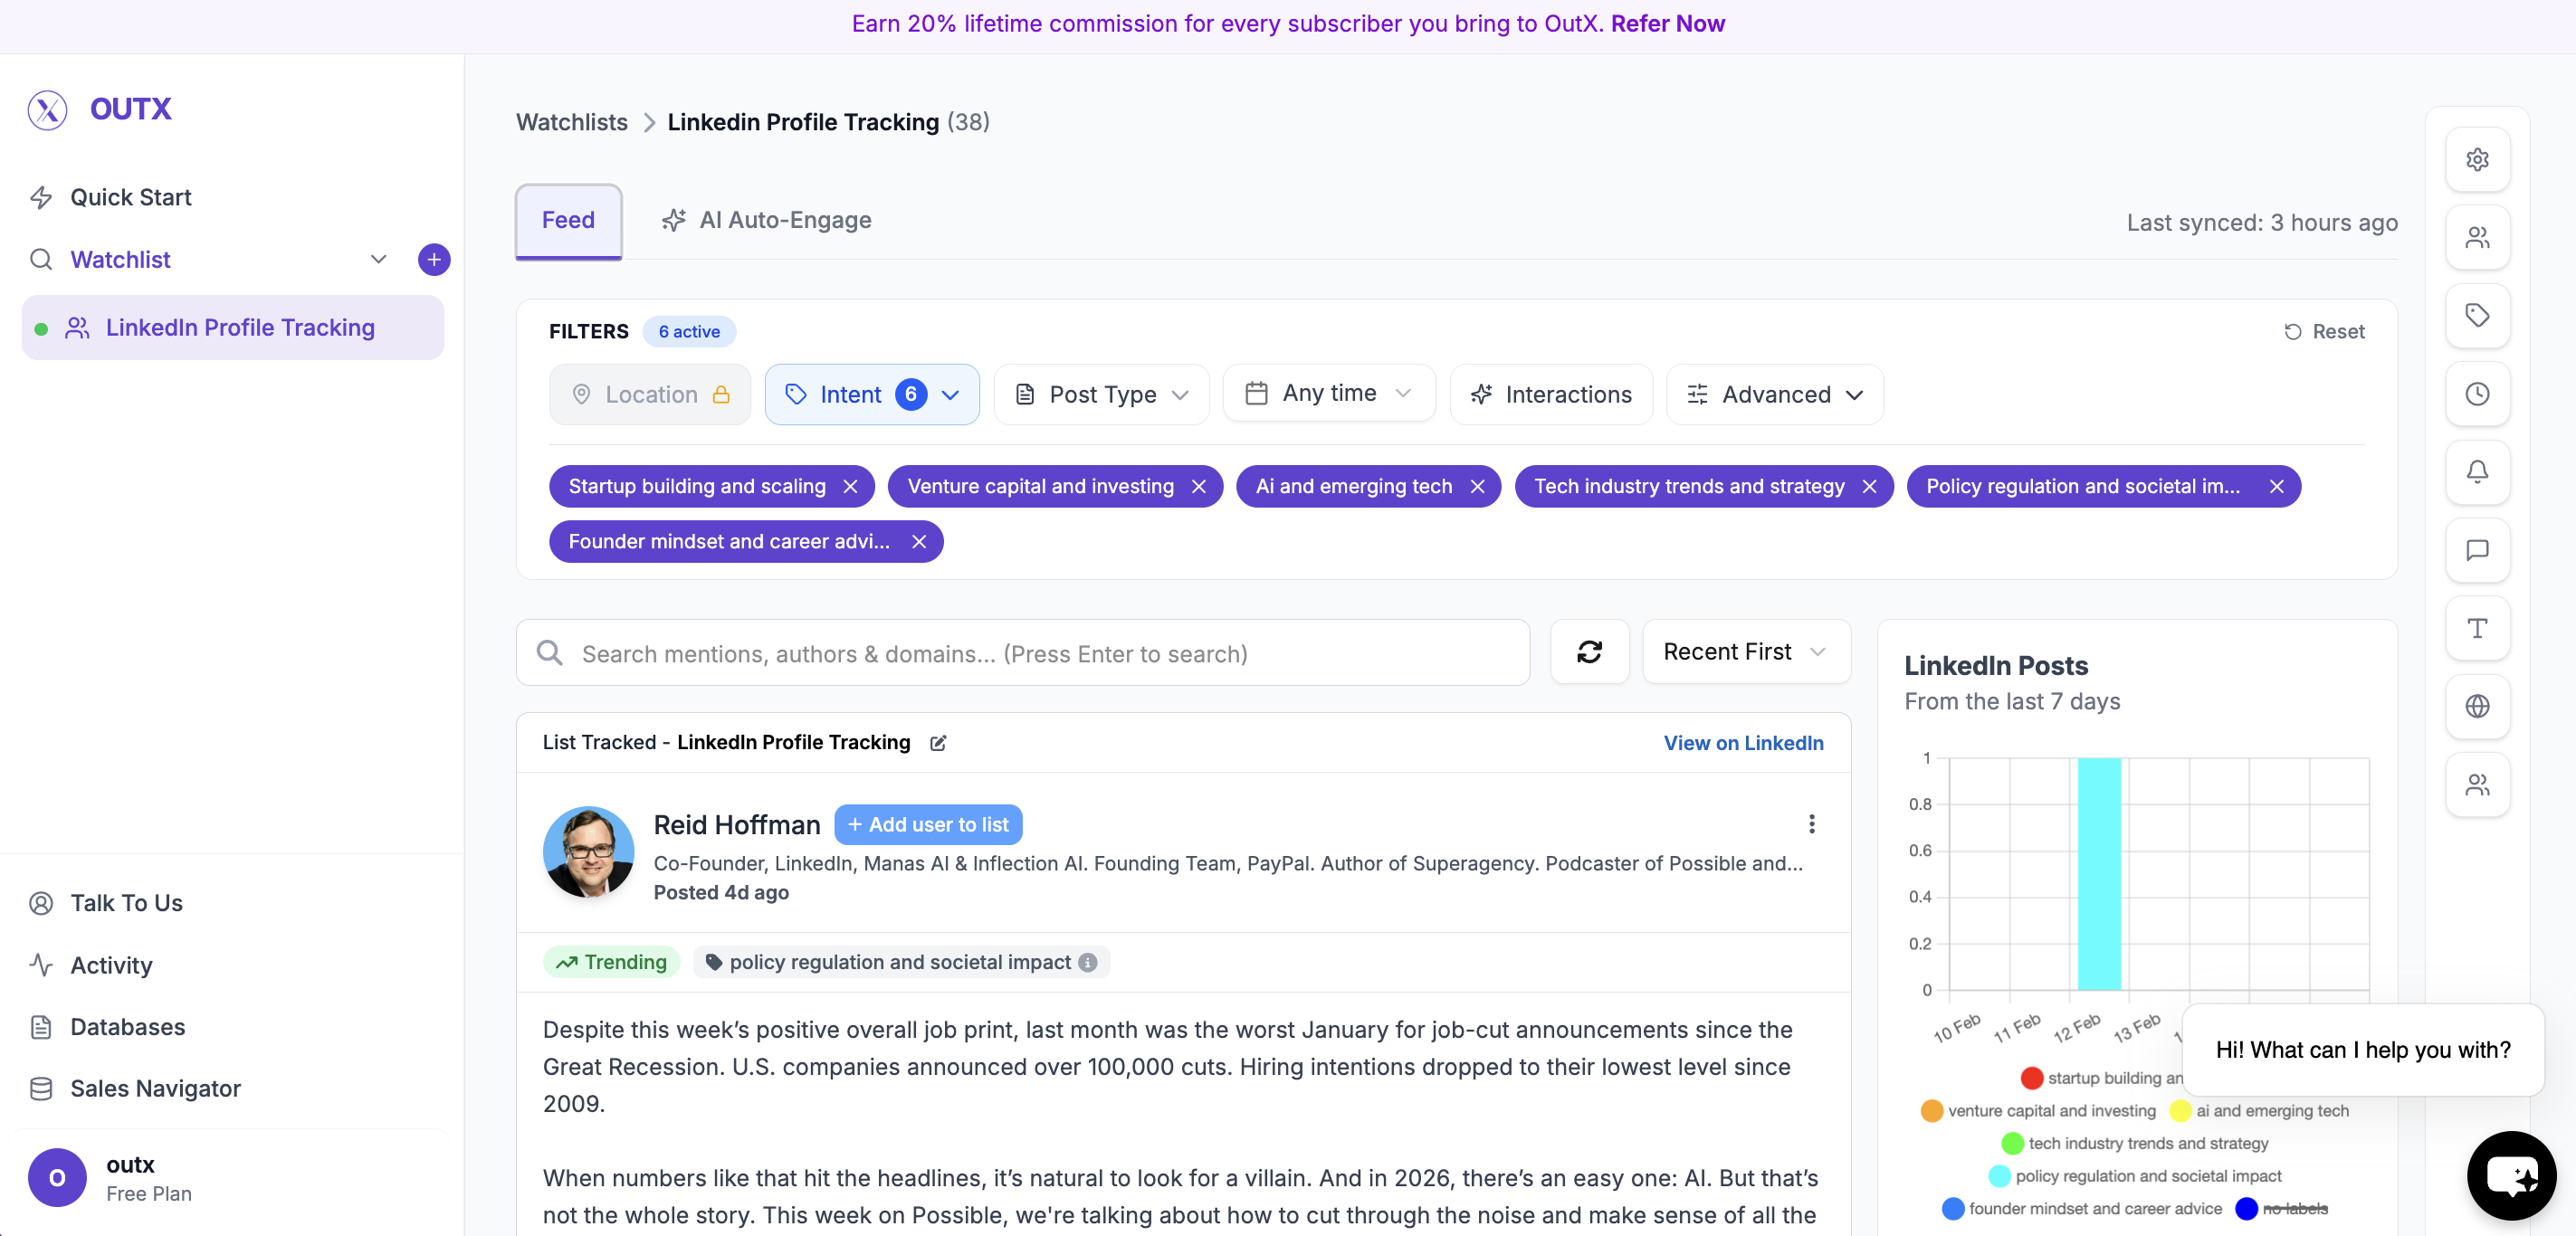
Go to any post inside your watchlist feed. This includes posts captured from:- Keywords
- Tracked people
- Tracked companies
Step 2: Click on Comment
Open the comment action for the post you want to respond to. This keeps the interaction contextual and focused on that post.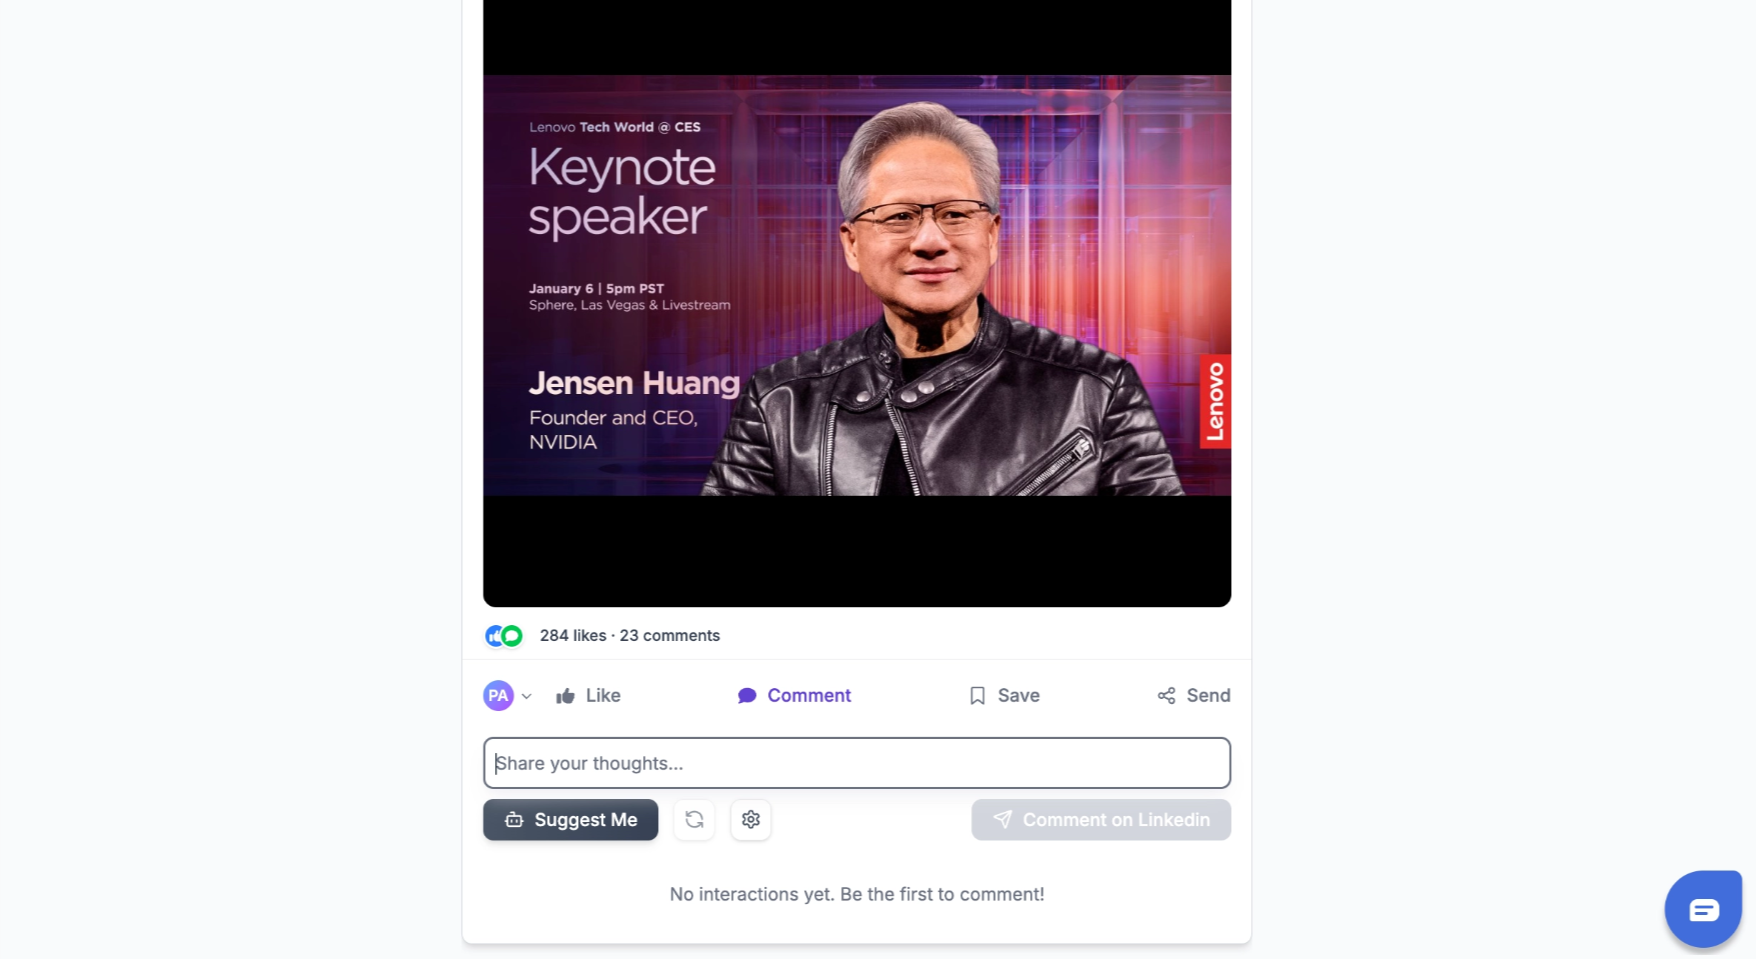
Step 3: Click “Suggest Me”
Click Suggest Me to generate an AI-written comment. The suggestion is based on:- The post content
- Your tracking context
- A natural, professional tone
Customizing Comment Tone and Style
You can control how AI-generated comments sound by editing the Comment prompt (this is the same thing as “Custom Instructions” - they refer to the same setting). To find it: Click the Gear icon next to the comment input area: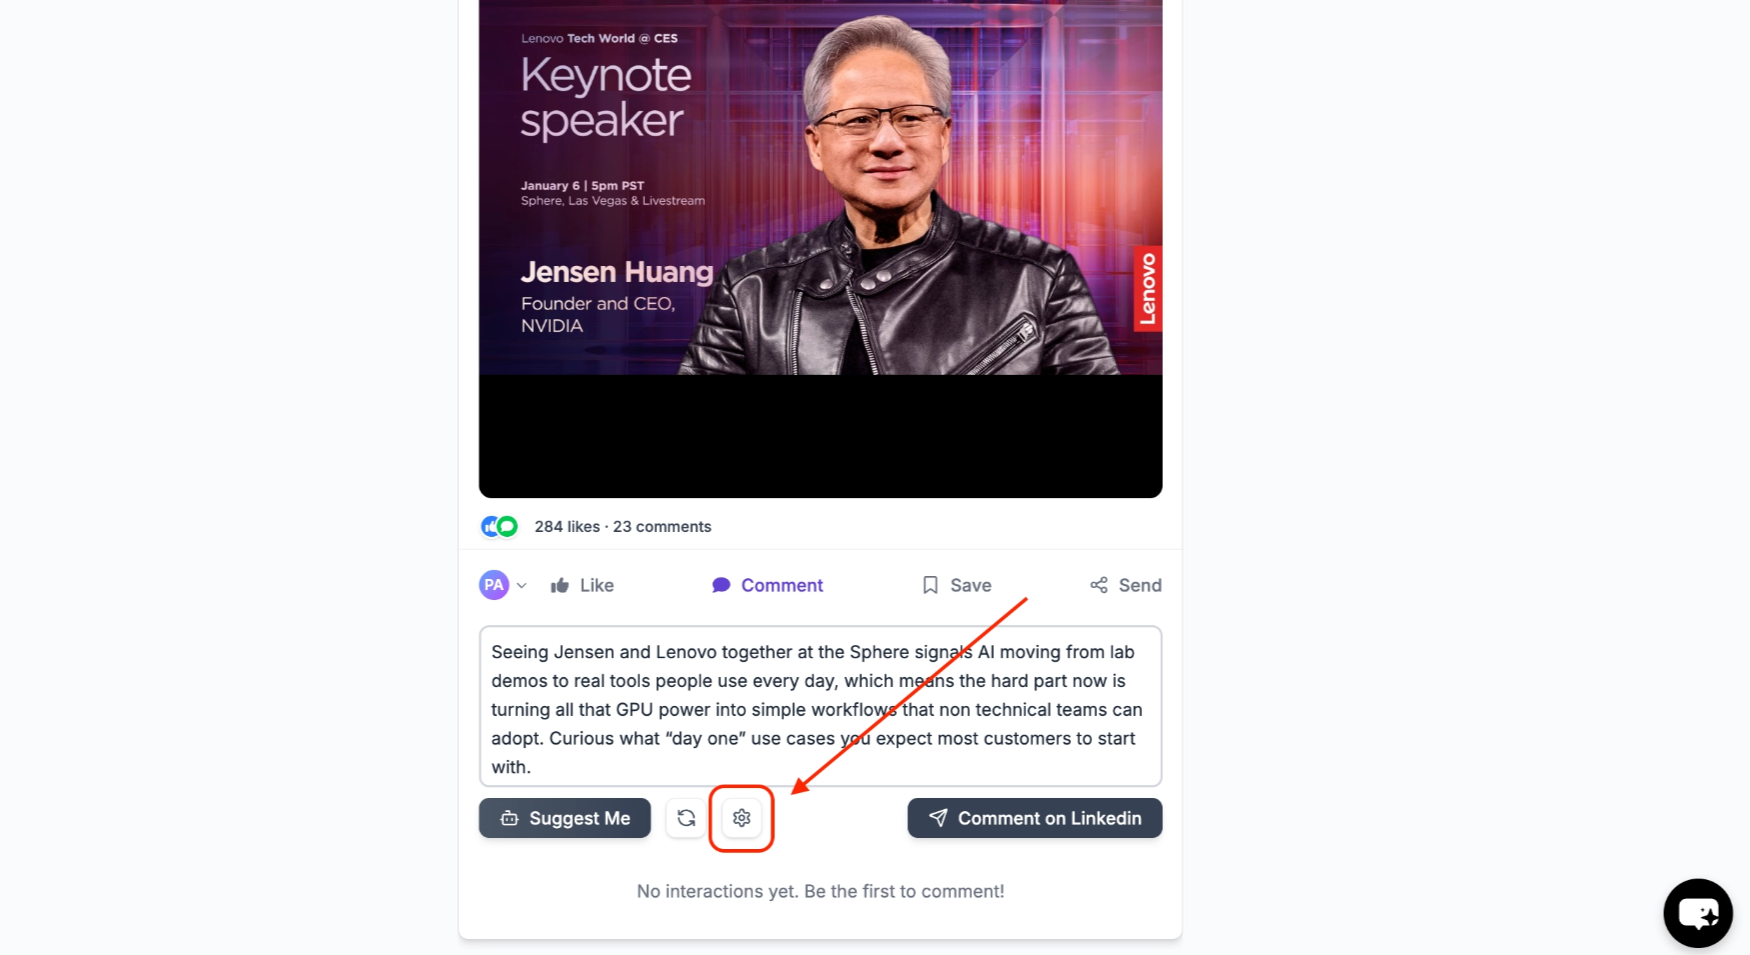
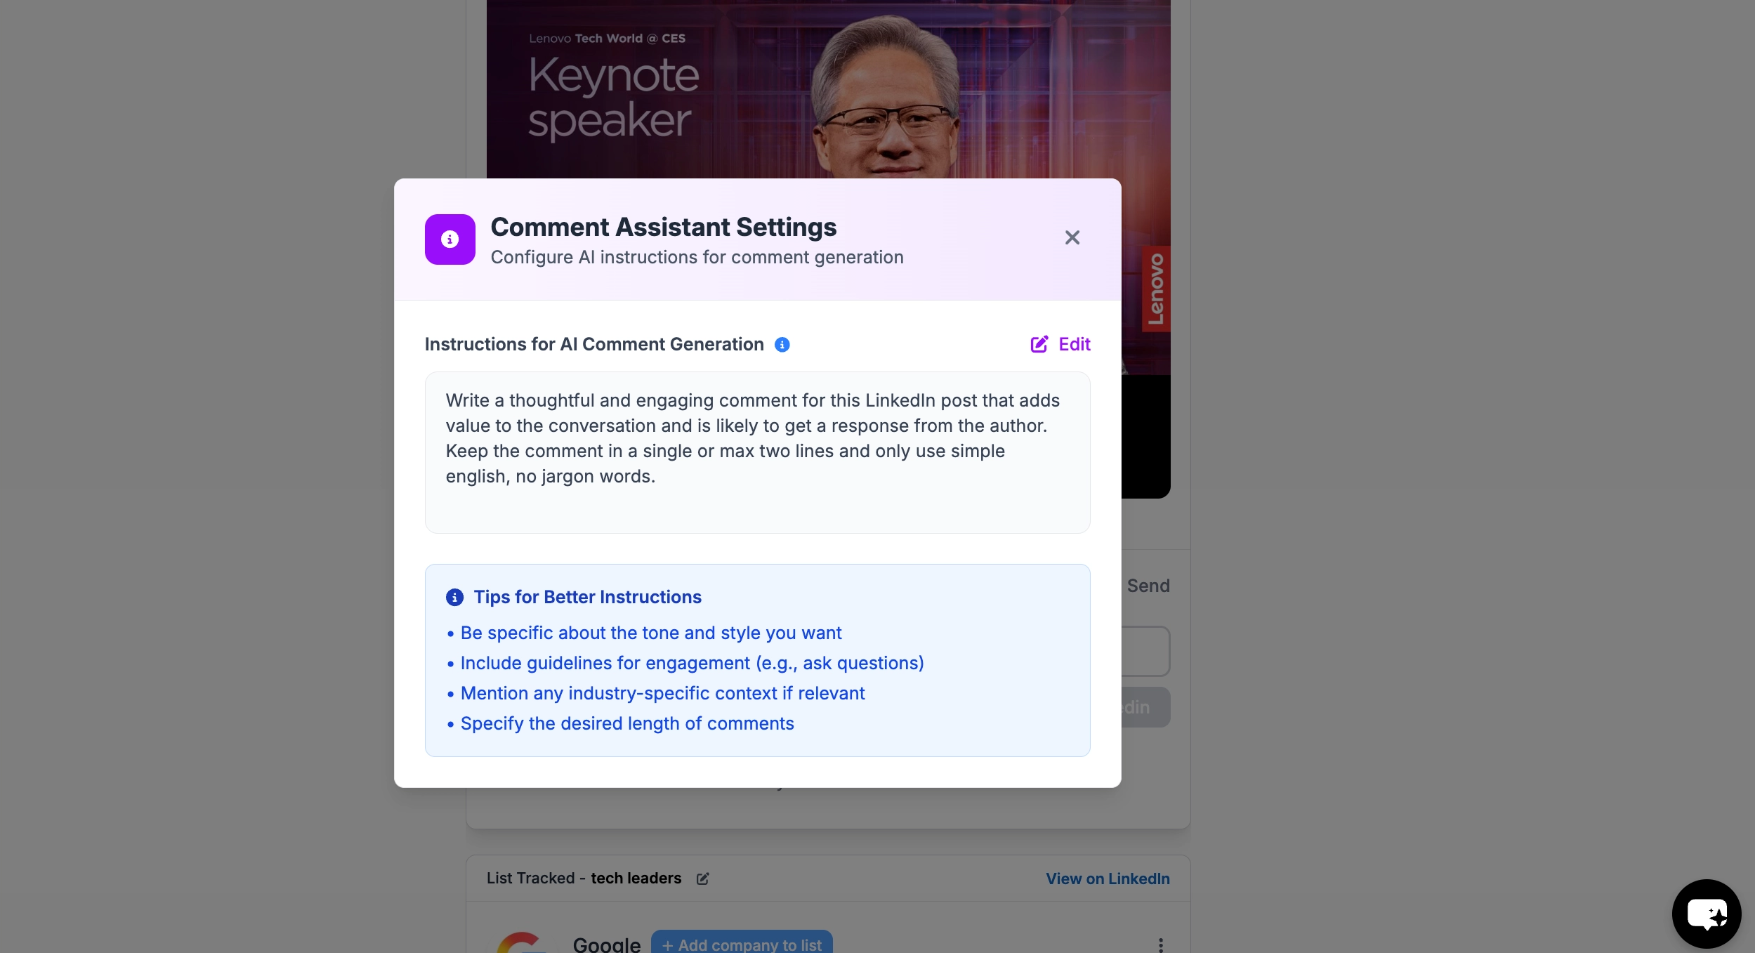
- “Write casual, friendly comments. Keep it to 1-2 sentences.”
- “Be professional and insightful. Reference specific points from the post.”
- “Write from the perspective of a SaaS founder. Be authentic, not salesy.”
Step 4: Post When Ready
Once satisfied, post the comment directly on LinkedIn. If it doesn’t feel right, you can simply skip it.Use Both Together
Most teams use both options together:- Auto Engagement for daily visibility
- Manual AI comments for important conversations
Frequently Asked Questions
Does auto-engagement work when my browser is closed or computer is off?
Does auto-engagement work when my browser is closed or computer is off?
No. The OutX Chrome extension must be running in your browser for auto-engagement to work. If you close the browser or shut down your computer, auto-engagement pauses and resumes when you open the browser again. Keep Chrome open with the extension enabled for continuous engagement.
How do I change the tone or style of AI-generated comments?
How do I change the tone or style of AI-generated comments?
Click the Gear icon next to the comment input when viewing a post. You’ll see a field called “Comment prompt (optional)”, this is where you write instructions for the AI. For example: “Write casual, friendly comments in 1-2 sentences” or “Be professional and reference specific points from the post.” This applies to all AI-generated comments on your account.
Can I auto-like or auto-comment from my company page?
Can I auto-like or auto-comment from my company page?
Yes. When creating an engagement rule, you can choose between your personal LinkedIn account or a connected company page as the actor.
What are safe auto-engagement limits?
What are safe auto-engagement limits?
Start with 1-5 likes per hour and 1-3 comments per hour. OutX has built-in rate limiting to keep your activity natural and safe. Avoid setting very high limits to prevent LinkedIn from flagging your account.
Can I auto-engage only with posts from specific people or topics?
Can I auto-engage only with posts from specific people or topics?
Yes. Use the Advanced Options when creating a rule to filter by Intent, specific Profiles, Seniority Levels, Post Types, and time range. This ensures engagement stays targeted and relevant.
Why are comments showing under the wrong name?
Why are comments showing under the wrong name?
Comments are posted from the team member selected in the engagement rule. Check which account is set in the rule settings, it may be using a different team member’s LinkedIn account. Admin can change this in the rule configuration.
Can I buy or add likes to my own posts?
Can I buy or add likes to my own posts?
No. OutX does not sell likes. It automates engagement from real accounts you control on posts that match your watchlists.